IDE Settings for Matplotlib Animations
Introduction
The animation code in Ch. 14 of the textbook runs as written when Python is executed from a terminal window. For Jupyter and Spyder, some slight adjustments need to be made. These adjustments may also be different for different operating systems. This page contains details.
Matplotlib gives us the option of using a variety of graphic backends to render the plots it creates. These backends are described in more detail in the usage guide. For Jupyter and Spyder, the default is often inline, which renders the plot in the notebook or console. This can prevent the animation code in the textbook from properly executing.
Terminal Window
The animation code in the textbook should run correctly as given. This should be true for Linux, Mac OSX, and Windows.
Jupyter
Linux and Mac OSX: In a Jupyter notebook, we need to add this line of “magic”:
%matplotlibto the top of the notebook or cell in which the animation code occurs for the animation code to work properly. In many cases in Jupyter, there is no need for calling plt.ion, but there is no harm in doing so.
Windows: In a Jupyter notebook, we need to add this line of “magic”:
%matplotlib notebookto the top of the notebook or cell in which the animation code occurs for the animation code to work properly. (Note, after executing this command, all subsequent cells will show figures inside an interactive format.) As with Linux and Mac OSX, there is no need for calling plt.ion, but there is no harm in doing so. Also, in Windows, we need to make the following additional changes:
- Calls to the matplotlib.pyplot
pausefunction to calling the time module’ssleepfunction. - Calls to the matplotlib.pyplot
drawfunction to calling thefig.canvas.drawmethod, assuming the plot’s matplotlibFigureobject is calledfig.
Also, while the plot will run with the above changes, the plot will not actually be in interactive mode after the run concludes. To make the plot again, the code needs to be re-run.
Spyder
To get the animation code to work properly, we have to change the graphics backend Spyder uses. This setting is found in the “Preferences” window:
- Linux: This is in the “Tools” option on the menu bar.
- Mac OSX: This is in the “python” option on the menu bar.
- Windows: This is in the “Tools” option on the menu bar.
In the “Preferences” window, select “IPython console”, then the “Graphics” tab. Go down to the “Graphics backend” option and select “Automatic” from the combo box, as shown below:
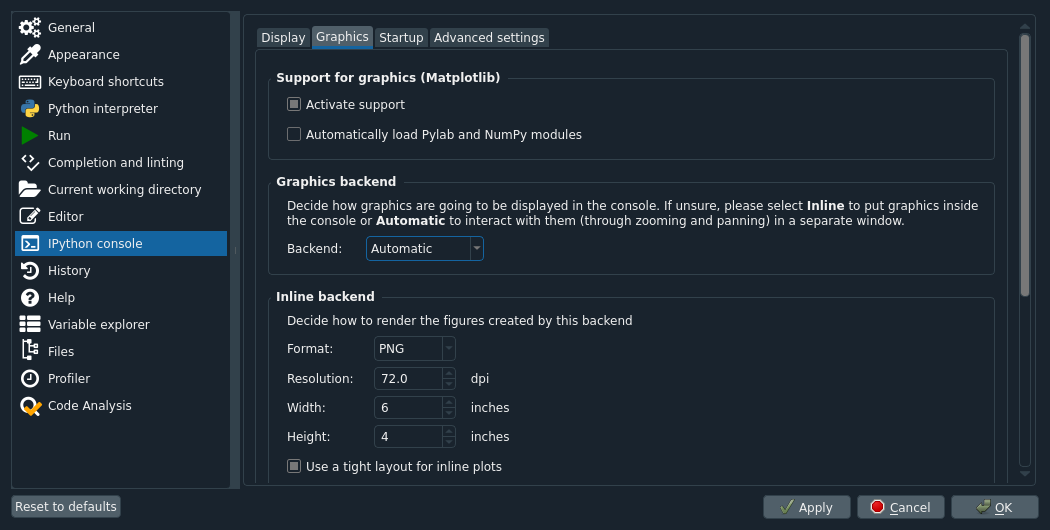
Select “Apply” and “OK”. The animation should work now.