

Warfare played a central role in shaping the organization and trajectories of many sociopolitical groups during the Andean Late Intermediate period (AD 1000–1450; Arkush Reference Arkush2005, Reference Arkush, Arkush and Allen2006; Arkush and Tung Reference Arkush and Tung2013; Earle Reference Earle1997, Reference Earle and Haas2001; Julien Reference Julien2003; Kurin Reference Kurin2012, Reference Kurin2016). During this time, many populations experienced warfare that was endemic, internecine, and part of everyday existence. Late Intermediate period (LIP) warfare remains an important topic of inquiry because it has been shown to be the most extreme example of recurrent coalitional violence yet observed during Andean prehistory (see Arkush and Tung Reference Arkush and Tung2013). A salient question within broader investigations of warfare concerns the strategies developed by LIP populations to cope with endemic conflict. This article focuses on one key coping mechanism: the protection of people and resources through defensive strategies. Specifically, this study addresses how groups utilized artificial defenses (fortifications), natural defensibility, and settlement locations to guard against enemy incursions.
Defensive sites and features are the physical manifestations of defensive strategies. Archaeologists cannot directly observe prehistoric defensive strategies, but they can reconstruct such strategies by interpreting variations in the design, investment, and distribution of defensive sites and features. By developing and testing models that predict what empirical patterns should be observed if a particular defensive strategy was utilized, scholars gain the ability to explain prehistoric systems of defense. Through this research process, archaeologists can better understand the complex and diverse ways people in the past adapted to chronic warfare and the decisions involved in defensive practices (Field Reference Field2008). This research program is oriented toward a growing body of literature that critically evaluates the connection between human conflict and defensive strategies. The goal of this program is to understand how prehistoric warfare shaped human societies and the mechanisms by which violence was, and is, perpetuated or mitigated (Arkush Reference Arkush2011; Field Reference Field2008; Martindale and Supernant Reference Martindale and Supernant2009; Roscoe Reference Roscoe, VanDerwarker and Wilson2016; Smith and Cochrane Reference Smith and Cochrane2011). To this end, I evaluate explanatory models of defensive practices using the southern Andes as a case study, and follow this with a discussion of patterns of warfare in the region.
Investigations were conducted at 15 LIP sites in the upper valleys of the southern Nazca region (Upper SNR) of Peru (Figure 1). Statistical and GIS analyses were performed on intra- and intersite variation in defenses and settlement patterns. Macrospatial patterns are discussed in terms of the relationship between defensive sites and socioeconomic resources. A brief summary of LIP culture-history and the region being investigated is presented first to provide necessary context, followed by an overview of the justifications for classifying these settlements as defensive sites related to warfare.
ArcMap 10.2 map of the study region and surrounding areas.

The Late Intermediate Period
The LIP falls temporally between the Middle Horizon (AD 600–1000), dominated by the Wari Empire in the central highlands, and the Late Horizon (AD 1450–1532), defined by the Cuzco-based Inca Empire. The LIP in the Nazca region began shortly after the decline and collapse of the Wari Empire, sometime around the late tenth century AD (Schreiber Reference Schreiber1992), when it left behind a power vacuum and a population that had been under some form of Wari control for centuries (Conlee Reference Conlee2004; Schreiber Reference Schreiber1992). The last decade of research has produced a large body of evidence that characterizes the LIP as a time marked by endemic warfare (Arkush Reference Arkush2005, Reference Arkush, Arkush and Allen2006; Arkush and Tung Reference Arkush and Tung2013; Brown Vega Reference Brown Vega2009; Julien Reference Julien2003). Bioarchaeological data demonstrate that violent trauma was more pronounced during the LIP than in any other period in Andean prehistory (Arkush and Tung Reference Arkush and Tung2013; Kurin Reference Kurin2012; Schjellerup Reference Schjellerup1997; Tung Reference Tung2008; Verano Reference Verano, Arnott, Finger and Smith2003). It was also a time of political turmoil, as polities decentralized and populations spread from large centers to form smaller, more balkanized sociopolitical institutions (Conlee Reference Conlee2004, Reference Conlee, Schwartz and Nichols2010; Conlee and Schreiber Reference Conlee, Schreiber, Elson and Covey2006; Covey Reference Covey2008; Parsons et al. Reference Parsons, Hastings and Mendieta2000). Power became diffuse and heterarchical, mostly dominated by local war chiefs whose power and authority were limited, fragile, and based upon success in warfare (Arkush and Stanish Reference Arkush and Stanish2005; D'Altroy Reference D'Altroy1992; Earle Reference Earle1997; Julien Reference Julien2003). Settlement patterns reveal that defensibility was often of paramount concern to LIP groups (Arkush Reference Arkush, Arkush and Allen2006; Brown Vega Reference Brown Vega2009; Covey Reference Covey2008; Earle Reference Earle and Haas2001; Julien Reference Julien and Malpass1993; Stanish Reference Stanish1992; Vogel Reference Vogel2012). These differ substantially from those of the Middle Horizon, representing a relatively homogeneous adaptation to the dramatic changes that took place (Arkush and Tung Reference Arkush and Tung2013; Bauer and Kellett Reference Bauer and Kellett2010; Kellett Reference Kellett2010). Fortified hilltop sites (hillforts) emerged as a widespread settlement pattern of highland LIP communities and among some coastal populations (Arkush Reference Arkush, Arkush and Allen2006; Arkush and Tung Reference Arkush and Tung2013; Conlee Reference Conlee2004:214; Covey Reference Covey2008; Kurin Reference Kurin2016:51; Vogel Reference Vogel2012:162, 163).
Causal explanations for LIP warfare vary by region, but generally pertain to climate drivers or sociopolitical imperatives. Scholars who have noted a lag between the collapse of the Wari and Tiwanaku states and the outbreak of endemic warfare argue that state collapse and the resultant sociopolitical turmoil were not the ultimate drivers of warfare (Arkush Reference Arkush2011; Kellett Reference Kellett2010). Instead, climatic change leading to decreased precipitation is seen as the primary culprit for pushing groups into conflict over scarce land and other economic resources (Abbott et al. Reference Abbott, Seltzer, Kelts and Southon1997; Arkush Reference Arkush2008; Kellett Reference Kellett2010; Seltzer and Hastorf Reference Seltzer and Hastorf1990; Torres-Rouff and Costa Reference Torres-Rouff and Junqueira2006). Others propose that the political instability that was the outcome of Wari and Tiwanaku collapse led to increased political competition, ethnic tensions, and factionalism (Arkush Reference Arkush2008; Earle Reference Earle1997; Kolata Reference Kolata1993; Kurin Reference Kurin2012). These processes then drove conflict over limited positions of political power, ethnic hatreds, and key socioeconomic resources. Whatever the cause, many scholars agree that the internecine warfare that defined the LIP became an engine of factionalism that effectively prevented the formation of multiregional polities that might have been able to unify competing groups (Arkush Reference Arkush2011; Earle Reference Earle and Haas2001). Patterns of intense conflict persisted until the spread of the Inca Empire in the mid–AD 1400s and their forced pacification strategy known to us as the Pax Inca (D'Altroy Reference D'Altroy2002). Whether one of these processes led to the initiation and perpetuation of warfare in the southern Nazca region remains to be seen, and will be the topic of future investigations.
The LIP in the southern Nazca region is characterized by transformations that echo broader LIP patterns, and include intergroup conflict, demographic instability, volatile and heterarchical political structures, and the termination of centralized ritual and monumental construction (Conlee Reference Conlee2003, Reference Conlee, Schwartz and Nichols2010; Conlee and Schreiber Reference Conlee, Schreiber, Elson and Covey2006; Silverman Reference Silverman2002). Most of these insights come from research conducted by Christina Conlee at several LIP sites in the region. Her work has shown that Nazca populations ceased the construction of large monuments and refocused ritual activities to localized, perhaps site-specific, scales (Conlee Reference Conlee2004). Several of the sites Conlee investigated contain defensive features and piles of sling stones, suggesting the existence of conflict (Conlee Reference Conlee2003, Reference Conlee2004, Reference Conlee2015). Established power structures focused on heterarchical relationships, with a conspicuous absence of traditional displays of status (Conlee Reference Conlee2004). Demographic data indicate unstable population fluctuations, with a total abandonment of the region in the early LIP (Conlee Reference Conlee2003; Conlee and Schreiber Reference Conlee, Schreiber, Elson and Covey2006; Schreiber and Lancho Reference Schreiber and Rojas1995). The region was gradually repopulated during the middle and late LIP and eventually saw the transition to a dense and highly aggregated regional population (Browne Reference Browne and Saunders1992; Conlee Reference Conlee2004). Environmental changes led to increased aridity, prolonged water shortages, and concomitant resource scarcity (Binford et al. Reference Binford, Kolata, Brenner, Janusek, Seddon, Abbott and Curtis1997; Conlee Reference Conlee2015; Fehren-Schmitz et al. Reference Fehren-Schmitz, Haak, Mächtle, Masch, Bastien, Cagigao, Sossna, Schittek, Cuadrado, Eitel and Reindel2014; Hillyer et al. Reference Hillyer, Valencia, Bush, Silman and Steinitz-Kannan2009). These factors may have been partly responsible for the abandonment of the region in the early LIP, and would have put a premium on maintaining and defending arable land (Conlee Reference Conlee2015). These social, political, and environmental dynamics combined to render the southern Nazca region primed for conflict, making it an excellent case study to investigate warfare and defensive strategies.
The Upper SNR and its Hillforts
The Upper SNR encompasses five river valleys that form the southern drainage of the Río Grande de Nazca. The region is bordered by the Coastal SNR to the west, at the foot of the valleys; the Lucanas region in the sierra to the east; the Acarí valley to the south; and the upper valleys of the central Nazca region to the north (Figure 1). Situated along the chaupiyunga (1,200–2,500 m asl) and quechua (2,500–3,300 m asl) vegetation zones, the Upper SNR straddles the coastal and sierra vertical ecologies (Denevan Reference Denevan2001). Running down the valleys are five streams that discharge a negligible volume of water and are prone to desiccation during the dry season (Oficina Nacional de Evaluación de Recursos Naturales [ONERN] 1971). Upper SNR valleys are steep, narrow, and boulder-strewn, restricting substantial human occupations to several pockets of open land known colloquially as cabezadas. Cabezadas are defined as the open areas of terrain with gradual topography compared to the otherwise steep valleys. The cabezadas are the only areas in the Upper SNR where substantial agriculture is possible due to their relatively gentle slopes, potential for irrigation, and seasonal precipitation from December through March (ONERN 1971). The cabezadas are situated roughly 2,000 to 3,000 m asl and rapidly gain elevation as they extend east. They are surrounded by the puna, a high plain that extends east across the continental divide into the sierra. The puna is an ideal environment for herding due to its flat topography and abundant grasslands (Parsons et al. Reference Parsons, Hastings and Mendieta1997). The puna in the Upper SNR is not viable for agriculture due to high elevations, frost potential, and unsuitability for irrigation. Thus, the cabezadas represent a prime example of ecological circumscription, being the only areas in the Upper SNR suitable for agriculture and thus substantial human occupation (Carneiro Reference Carneiro1970). These factors combine to concentrate agricultural zones—and human occupations—into clearly defined, resource-dense patches surrounded by areas devoid of crops and large human settlements.
This investigation focuses on 15 LIP hillforts in the cabezadas of Aja, Tierras Blancas, Taruga, Chauchilla, and Las Trancas. The Aja cabezada contains two hillfort sites, Cerro Anamarca and Ayaorcco. The Tierras Blancas cabezada contains five hillfort sites: Ayapata, Ayapata East, Cerro Pucara, Cerro Leoncio, and Cerro Tarachallyu. The Taruga cabezada contains two hillforts, Cruz Pata and Toma. The Chauchilla cabezada contains four hillforts: Cerro Ayapata, Cerro Amayo, Chuluja, and Llaghua. The Las Trancas cabezada contains two hillfort sites, Cerro Chillca and Cerro Tribolpata. Ayaorcco, Cerro Leoncio, and Llaghua have been heavily impacted by local land-use practices, and as a result were included only in the settlement pattern analysis.
Each settlement exhibits a high density of residential structures and domestic artifacts, indicating that the Upper SNR settlements were permanently occupied residential sites rather than refuges. There is currently no evidence for nonfortified LIP settlements in the region, indicating that the hillfort adaptation was ubiquitous throughout the Upper SNR.
The LIP designation was assigned to each of these hillforts based on diagnostic artifacts and features from surveys. These include ceramics, rounded residential architecture, aboveground tombs (chullpas), hilltop settlement locations, lack of differentiation in the size and quality of residences, the practice of human cranial modification, and the lack of abundant materials diagnostic of previous or subsequent periods (Conlee Reference Conlee2003, Reference Conlee, Schwartz and Nichols2010; Conlee and Schreiber Reference Conlee, Schreiber, Elson and Covey2006; Hyslop Reference Hyslop1976; Parsons et al. Reference Parsons, Hastings and Mendieta2000). It should be noted, however, that excavations have not yet been conducted, leaving open the possibility that the hillforts contain pre-LIP sequences in subsurface strata.
Determining Defensibility
Several architectural features have been shown to indicate universal defensive functions (see Keeley et al. Reference Keeley, Fontana and Quick2007). These include V-shaped ditches, bastions, and baffled entryways. Defensive walls are other excellent indicators of defensive design (Arkush and Stanish Reference Arkush and Stanish2005; Haas Reference Haas, Feinman and Price2001; LeBlanc Reference LeBlanc1999). The geographic location of settlements and surrounding resources may indicate a defensive function. Occupations on hilltops or along cliff lines, the placement of settlements in areas that possess restricted access to resources or population centers, and the ability of groups to monitor travel corridors and resource patches are all potential indicators of defense. All 15 sites in the study area exhibit natural and constructed defensive features.
Multiple concentric stone walls surround each of the settlement's residential sectors. In each case, there is little evidence of occupation or land use between, or outside of, the walls, indicating that they functioned as defenses rather than agricultural terraces or supports for residential expansion. The defensive walls are substantially thicker and more robust than the walls that make up the residential architecture. As reported in the next section, the defensive walls are emphasized along the most accessible parts of the residential sectors and deemphasized or absent in areas with adequate natural defensibility. All sites are located on hilltops at elevations above the primary farming zones. The approaches to these sites are difficult and require climbing steep slopes. The nucleated hilltop settlements imposed substantial travel costs on residents, as access to the agricultural zones and water sources was rendered more difficult.
In addition to the ubiquitous defensive features located throughout the Upper SNR hillforts, there are defensive attributes that are unique to each settlement. I describe these attributes in detail to better contextualize each settlement's defenses.
In the Aja cabezada, the site Cerro Anamarca contains multiple discrete stone walls that are abutted along the easiest approach by exterior ditches that still exhibit stone lining along some stretches. Several of these stone walls are over four meters tall. Ayaorcco, while heavily impacted by taphonomic processes, still exhibits multiple discrete stone walls with large stone-backed ditches abutting the walls’ exterior. Both settlements are highly nucleated and are arrayed along ridgelines that face steep slopes and cliffs in many places.
In Tierras Blancas, the site Ayapata contains an interior east-facing bastion with an earthen parapet (Figure 2). Two stone walls run along the site perimeter, with an additional exterior stone wall at the base of the hill and several ditch systems running parallel to the walls (Figure 3). Segments of these walls are more than two meters thick, with several intact sections over three meters high. Ayapata spreads along a low hill with cliffs on one side on a plateau 700 m above the primary farmland and waterway. Cerro Pucara is also heavily defended by several stone walls surrounding the settlement. The settlement itself is spread along two separate knolls and a connecting saddle on a small plateau above the main agricultural zone. Both Ayapata East and Cerro Leoncio contain several concentric stone walls surrounding the residential sector and earthen ramparts curving around the site perimeter. Cerro Tarachallyu is one of the most heavily fortified sites, with three discrete concentric stone walls fronted by deep stone-lined ditches that wrap around the site perimeter (Figure 4). These walls are in many instances on nearly flat ground and are two to three meters thick in places. The site itself stretches along a narrow ridgeline that faces steep slopes and cliffs except for two constricted approaches that funnel directly into the fortification and ditch features.
The bastion at Ayapata—over two meters thick and over three meters high on the front face. This structure covers the easiest approach to the site.

The foundation of the exterior defensive wall at Ayapata. Note the ditch at the base of the wall.

The exterior defensive wall at Cerro Tarachallyu. This large wall blocks the easiest approach to the residential area.

In the Taruga valley, Cruz Pata (Figure 5) contains two distinct stone walls, the exterior of which is over two meters thick. The interior wall is even thicker, at three meters in certain sections. Toma has a very similar spatial and architectural layout. Two distinct stone walls circumvallate the settlement except for an entrance to the west. The eastern sector exhibits a tertiary stone wall between the other two. Both Cruz Pata and Toma lie on hilltops that render the farms and water systems less accessible to hillfort residents. Cruz Pata is located above and outside of the cabezada, which would have required substantial travel times to reach the agricultural fields and water sources.
A Google Earth planview of Cruz Pata. Note the nucleated structures and the two defensive walls around much of the residential area perimeter.

In the Chauchilla valley, Cerro Ayapata contains a V-shaped stone-backed ditch and two distinct stone walls circumvallating the settlement (Figure 6). Enemies approaching from the northeast—the easiest approach—would be forced to cross the V-shaped ditch and traverse an unoccupied zone approximately 100 m wide before reaching the double-wall system. Cerro Amayo contains four distinct stone walls, several over two meters thick. The northern sector exhibits a double-baffled entryway that is restricted to such an extent that people can only enter the residential sector in single file. This settlement is so heavily fortified that nearly all the residences are densely clustered and restricted to the small conical hilltop located within the wall system. Chuluja contains an exterior wall along parts of the residential perimeter, and a large interior wall cutting off the eastern approach. The unfortified southeastern sector is located on a steep slope, which is the least accessible approach. Llaghua, while heavily impacted by modern land-use practices, still contains three to four visible stone walls, each curving around parts of the settlement's perimeter. Several of the intact wall segments are over four meters high and several meters thick.
A visual display of the easiest approach to Cerro Ayapata. Note the stone-backed ditch in the foreground and the exterior defensive wall on the horizon.

In the Las Trancas valley, Cerro Chillca contains multiple concentric stone walls that are fronted by ditches that wrap around the residential sector. Cerro Tribolpata shares similar architectural features. Multiple stone walls circumvallate the perimeter and several ditches span the easiest approach to the site.
The accumulated weight of evidence leads to the interpretation that these sites were defensive in nature. These populations expended considerable time and energy to live in defensible nucleated settlements with substantial natural and artificial defensive features. This conclusion in turn leads to an analysis of the defensive strategies deployed by the populations living in the region and how these practices related to those observed in other areas.
Intrasite Fortification Analysis
Numerous studies have demonstrated substantial intrasite variation in fortification features (Arkush and Stanish Reference Arkush and Stanish2005; Best Reference Best1975; Best Reference Best1993; Field Reference Field1998; Fox 1978; LeBlanc Reference LeBlanc1999; Prickett Reference Prickett1980). Researchers in many regions have produced a similar explanatory model, proposing that intrasite variation in fortification is driven largely by accessibility, whereby fortifications are emphasized along the easiest approaches to a settlement, and deemphasized or absent in areas with adequate natural defenses (Allen Reference Allen, Arkush and Allen2006; Arkush Reference Arkush2011; Arkush and Stanish Reference Arkush and Stanish2005; Best Reference Best1993; Firth Reference Firth1927; Fox Reference Fox1976; Prickett Reference Prickett1980; Solometo Reference Solometo, Arkush and Allen2006). Despite the nearly global recognition of the relationship between accessibility and defensive design, this link has yet to be tested quantitatively, and has instead been inferred through visual observation and description. The analysis presented here is the first to assess this association using quantitative methods. If this explanation of variation in intrasite fortification is supported, I expect differential fortification to be a function of accessibility.
Methods
To test the relationship between accessibility and differential fortification, statistical and GIS-based analyses were performed on 11 hillforts where reliable fortification data could be obtained. Quantitative methods currently exist for measuring defenses (e.g., Arkush Reference Arkush2011:147; Martindale and Supernant Reference Martindale and Supernant2009). These methods record various defensive features at a site to create a single composite defensive score for each site. These methods allow researchers to evaluate differences in defensive investment between settlements, but they do not allow for an assessment of intrasite variation in fortification. The fortification score (FS) and slope score (SS) methods developed here permit the assessment of variation in fortification within each site, allowing more information on defensive strategies to be obtained.
To measure intrasite variation, fortification features at each site were mapped using a Trimble GeoXM GPS and then georeferenced onto an ASTER DEM of 30 m resolution using ArcMap 10.2 to form a wall map of the site—a visual display of hillfort fortification features (Figure 7). The residential sectors were also mapped and georeferenced. To measure variation in fortification within each hillfort, sites were divided into quadrants, each pertaining to a cardinal direction (in this case, NE, NW, SE, SW). Each quadrant was then further divided radially into four equal-sized subquadrants in order to best demarcate the differences in fortification features within each hillfort. Intrasite variation in fortification was measured by quantifying the number of fortification features in each subquadrant. Each segment of a defensive wall or ditch was assigned a separate score of 0.25 for every quarter of a subquadrant the feature passes through. For example, if a wall passes through 75% of a subquadrant, it received a score of 0.75, or 0.25 if it passes through only 25% of a subquadrant. Any defensive features that pass through less than 25% of a subquadrant received a score of zero. The aggregate of these scores was coded as the subquadrant fortification score (Figure 7). The FS method is used as a relative measure of differences in fortification, rather than an absolute measure of time or energy investment.
An example of the fortification score (FS) method. Each value represents a subquadrant's FS. Subquadrant values were summed for the summed fortification score (SFS).

A slope raster was generated using ArcMap 10.2 as a proxy for accessibility. This proxy is justifiable because the approaches running up to each hillfort's defenses and residential sector are naturally devoid of movement-restricting vegetation and other potential obstacles that might have altered accessibility. Settlements surrounded by dense vegetation, bodies of water, or other natural or physical barriers require measurements other than slope to determine accessibility. The slope score method is not based on the assumption that accessibility changes linearly as a function of slope (Van Leusen Reference Van Leusen2002:6–7, 8). Rather, this method assumes that barring other obstacles, relative slope values determined whether fortifications were required to limit access to the interior residential sectors. In settlement sectors where slope values were sufficiently high, investment in fortifications may be lessened or unnecessary. Conversely, when slope values are low, fortifications may be required to reduce accessibility (Llobera Reference Llobera and Lock2000:71).
The average slope for each subquadrant was calculated for a 200 m buffer around the residential sector of each hillfort (Figure 8). The 200 m buffer represents the immediate approach to a hillfort's residential sector and corresponds to how difficult it would have been for a combatant to gain access to the population centers. A buffer distance of 200 m was selected in order to provide a minimum 50 to 100 m zone from the most exterior defensive feature to the end of the buffer, which represents the furthest effective range of the slings that were the predominant projectile weapon during the LIP (Brown Vega and Craig Reference Brown Vega and Craig2009; Keeley et al. Reference Keeley, Fontana and Quick2007).
An example of the slope score (SS) method. Each value represents the mean slope in degrees for each subquadrant. All subquadrant values were averaged for the combined slope score (CSS).

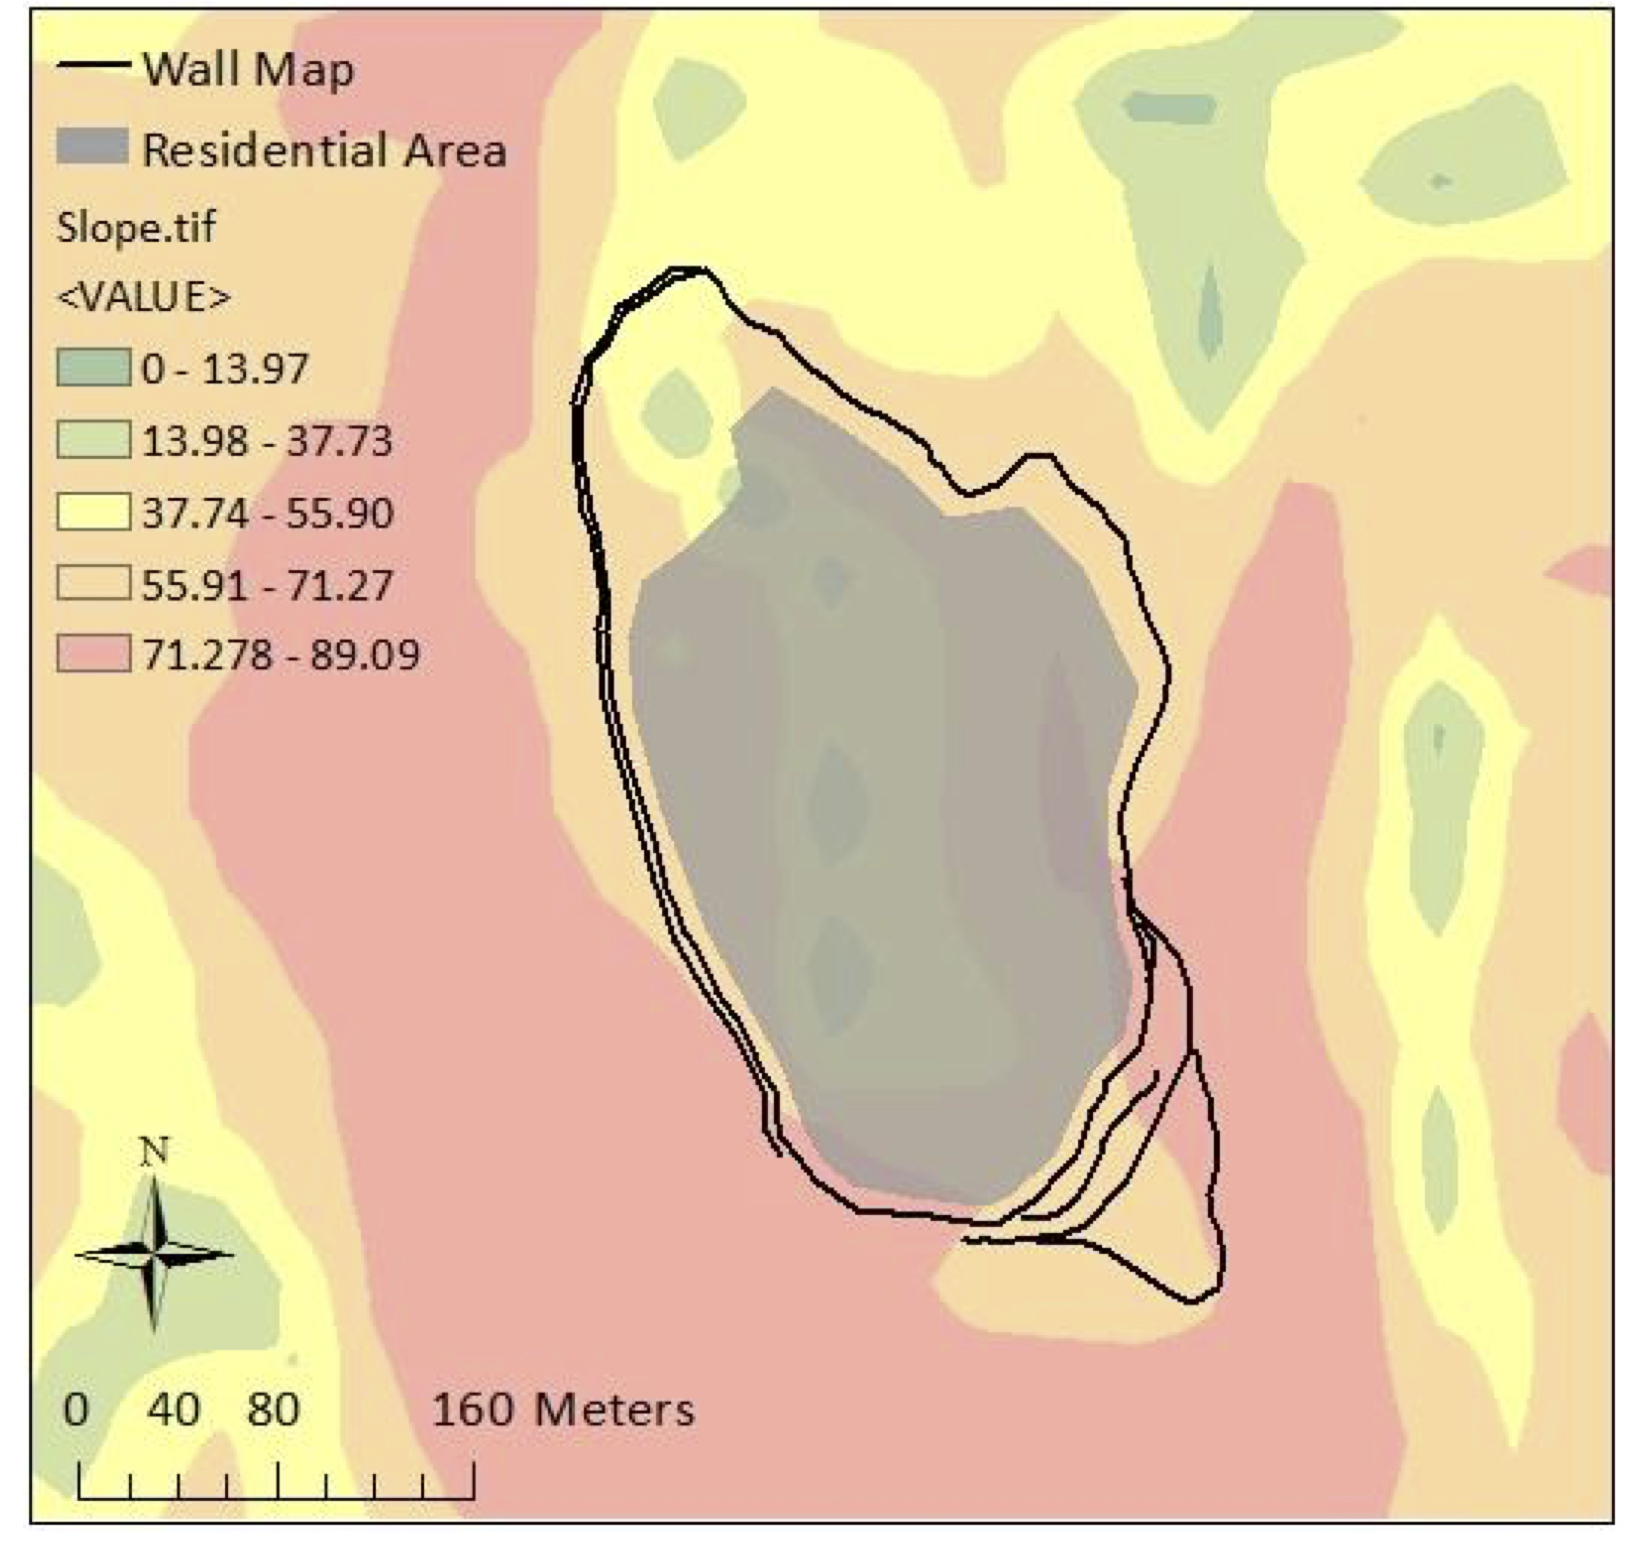
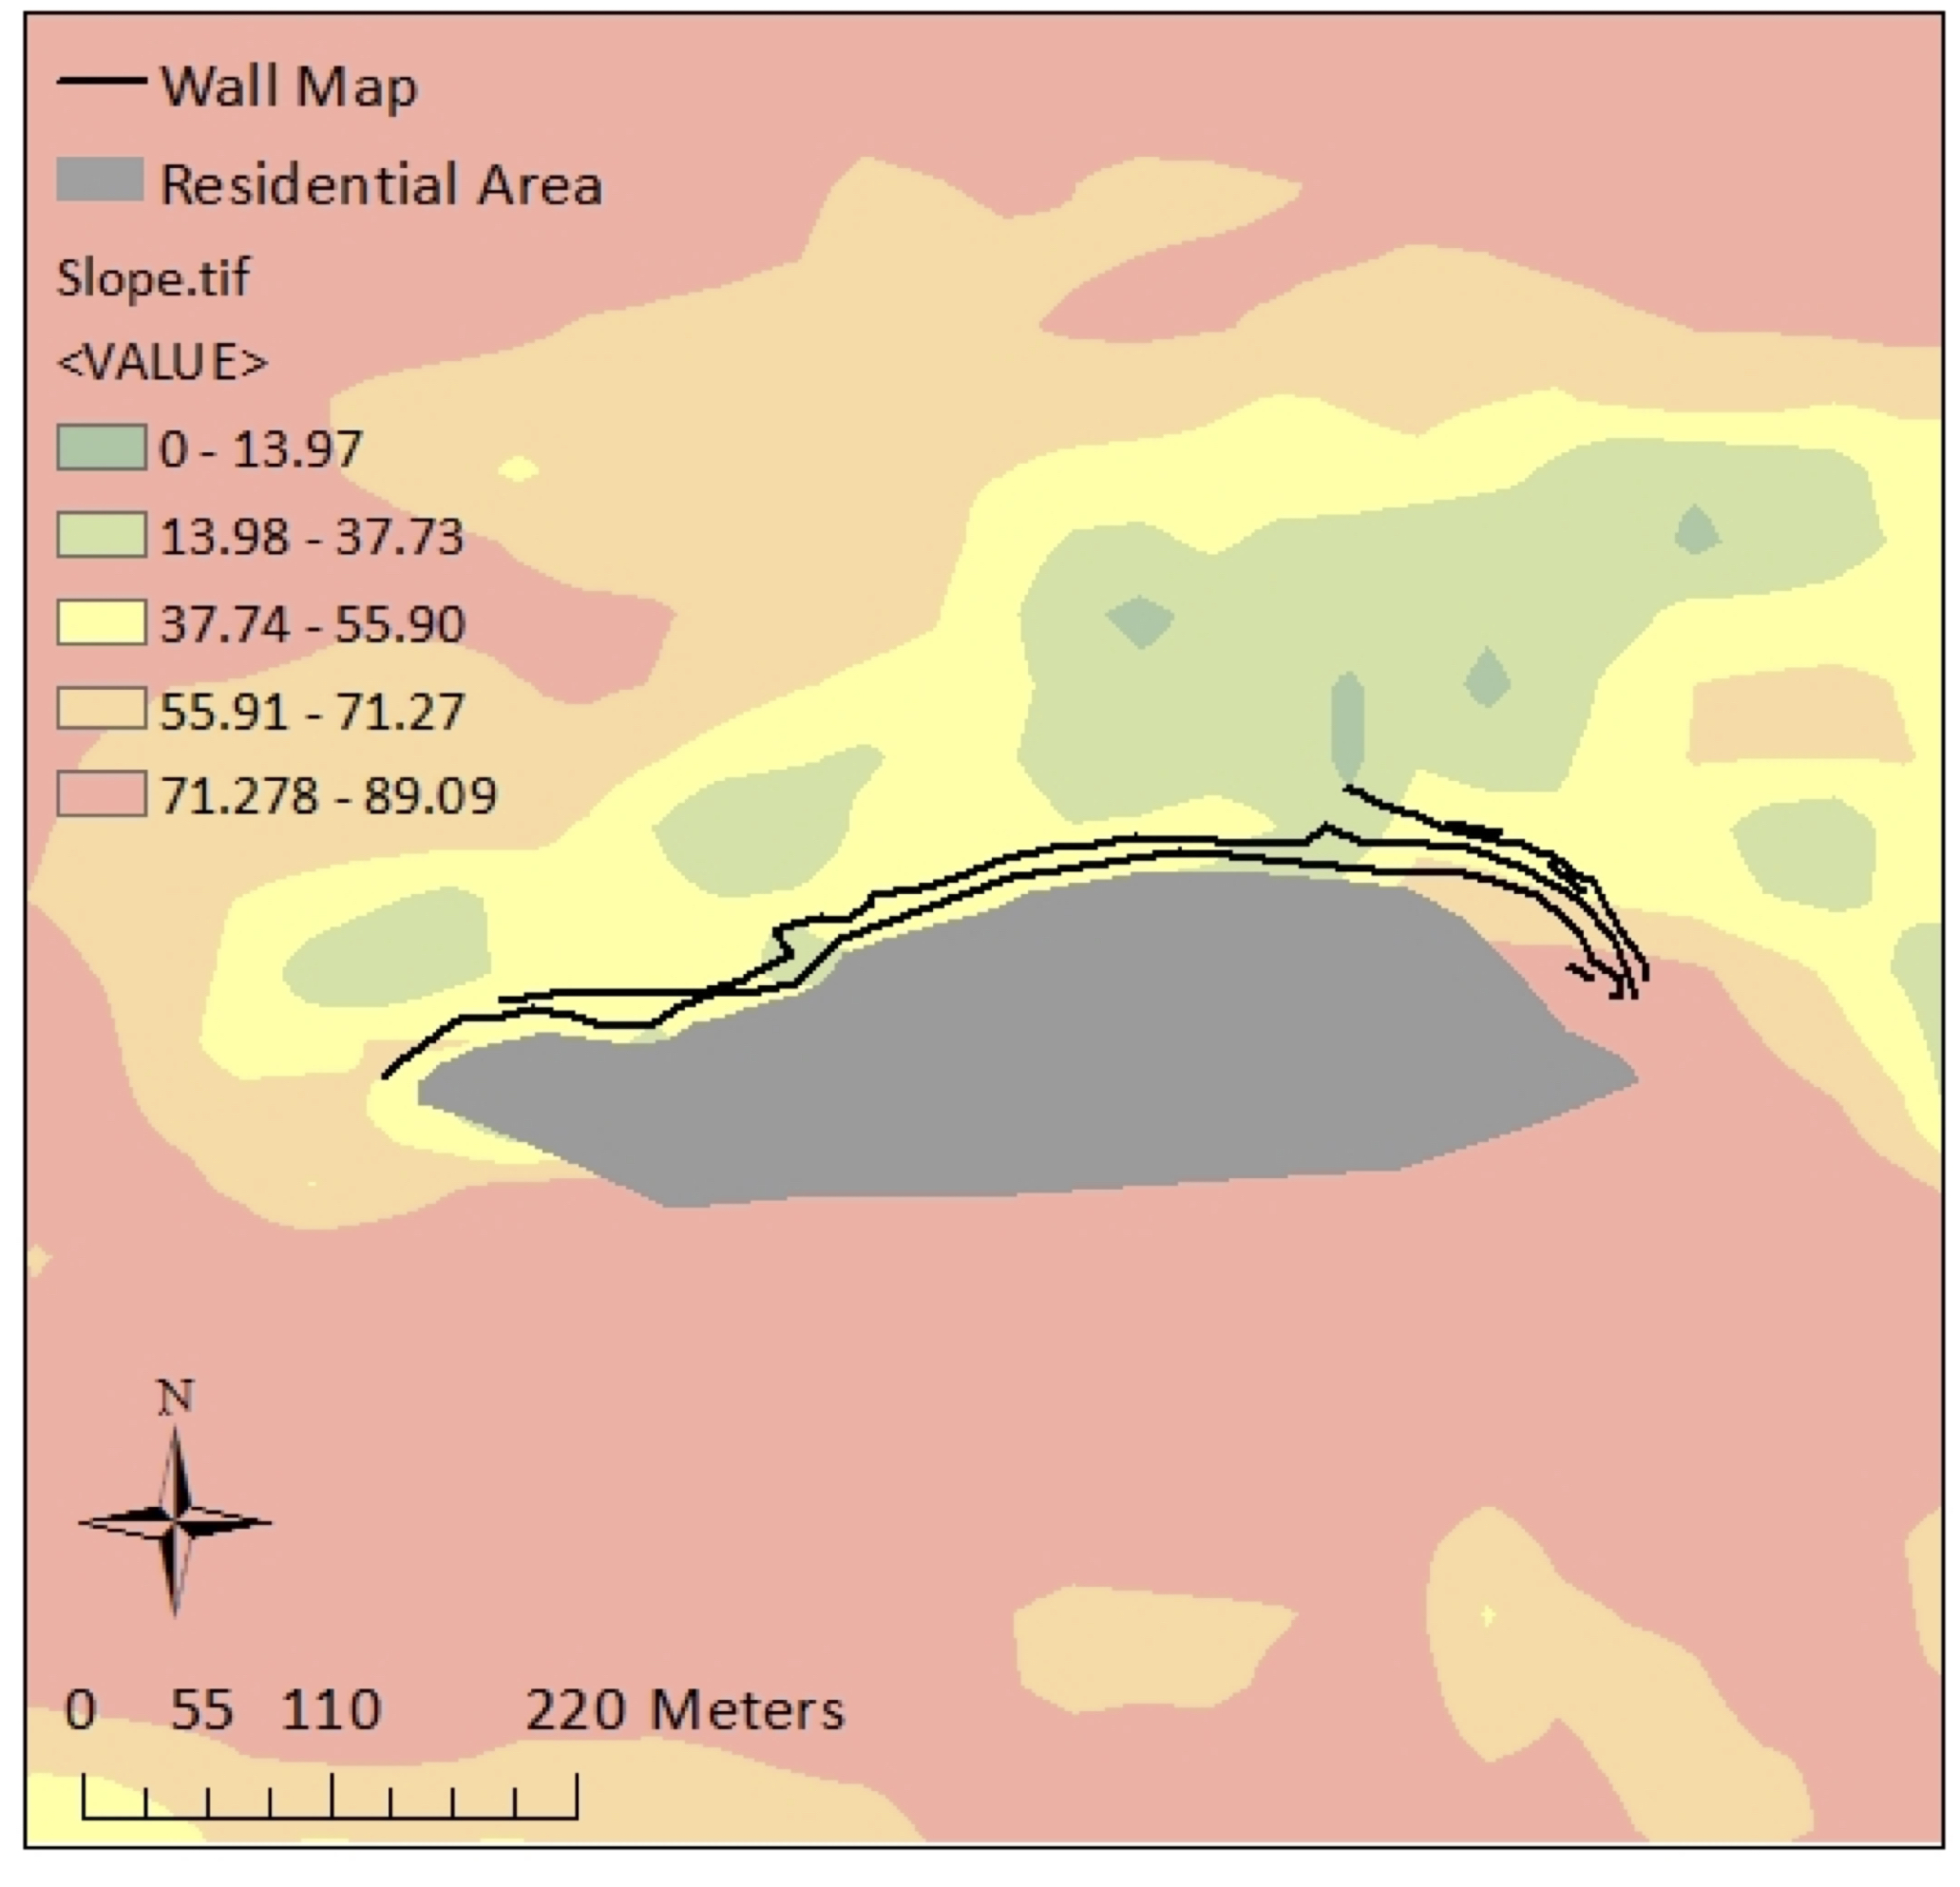
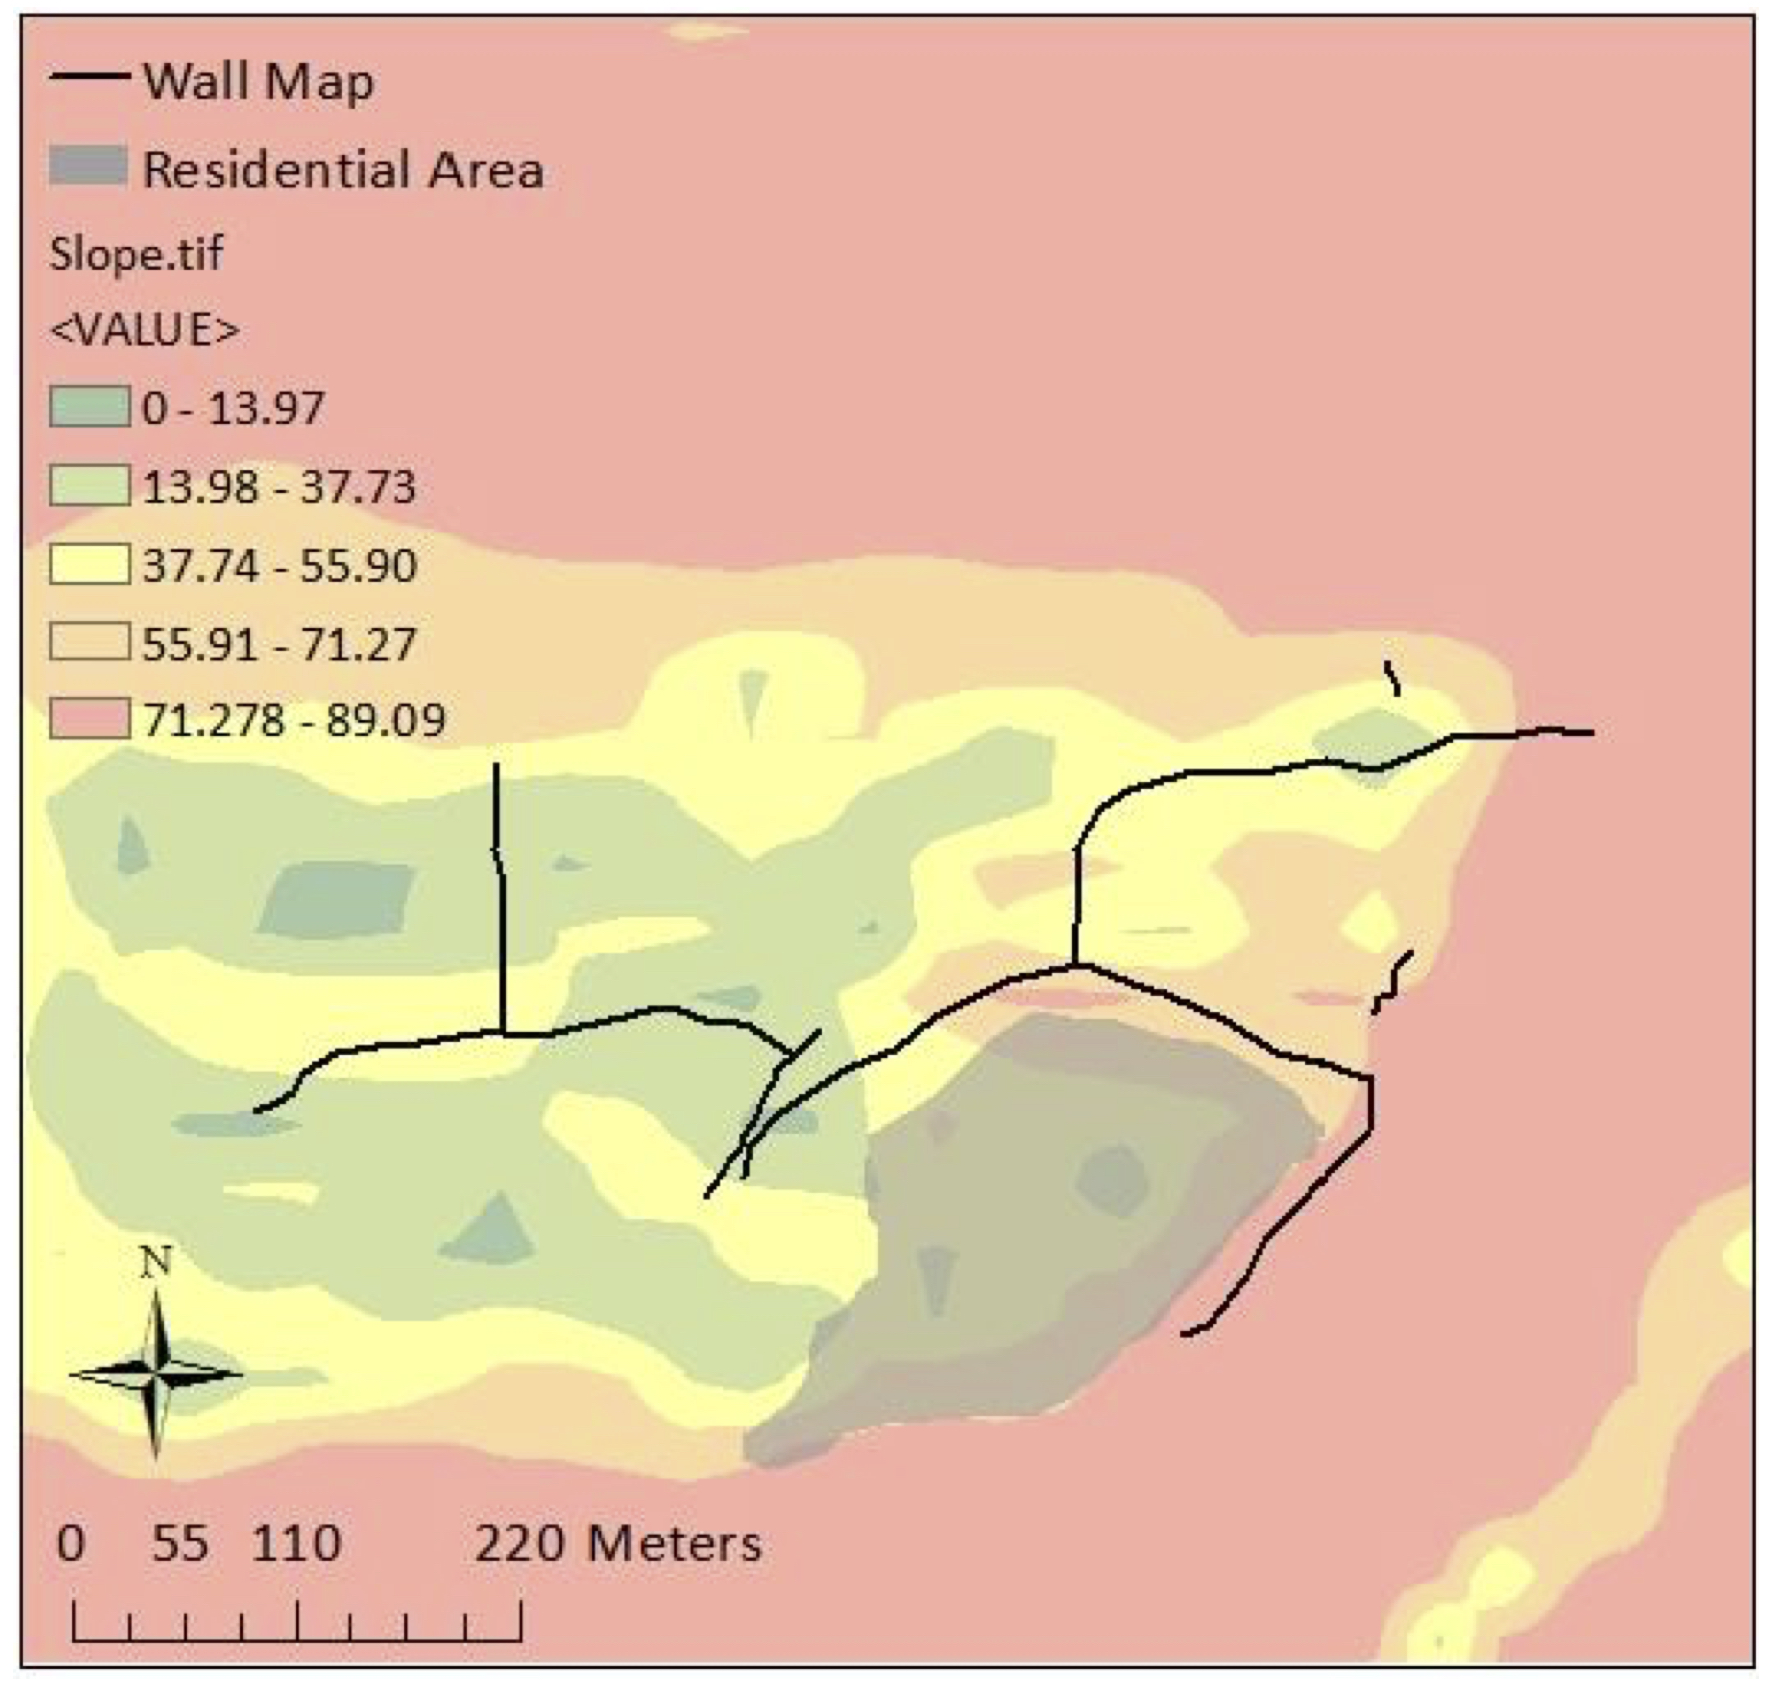
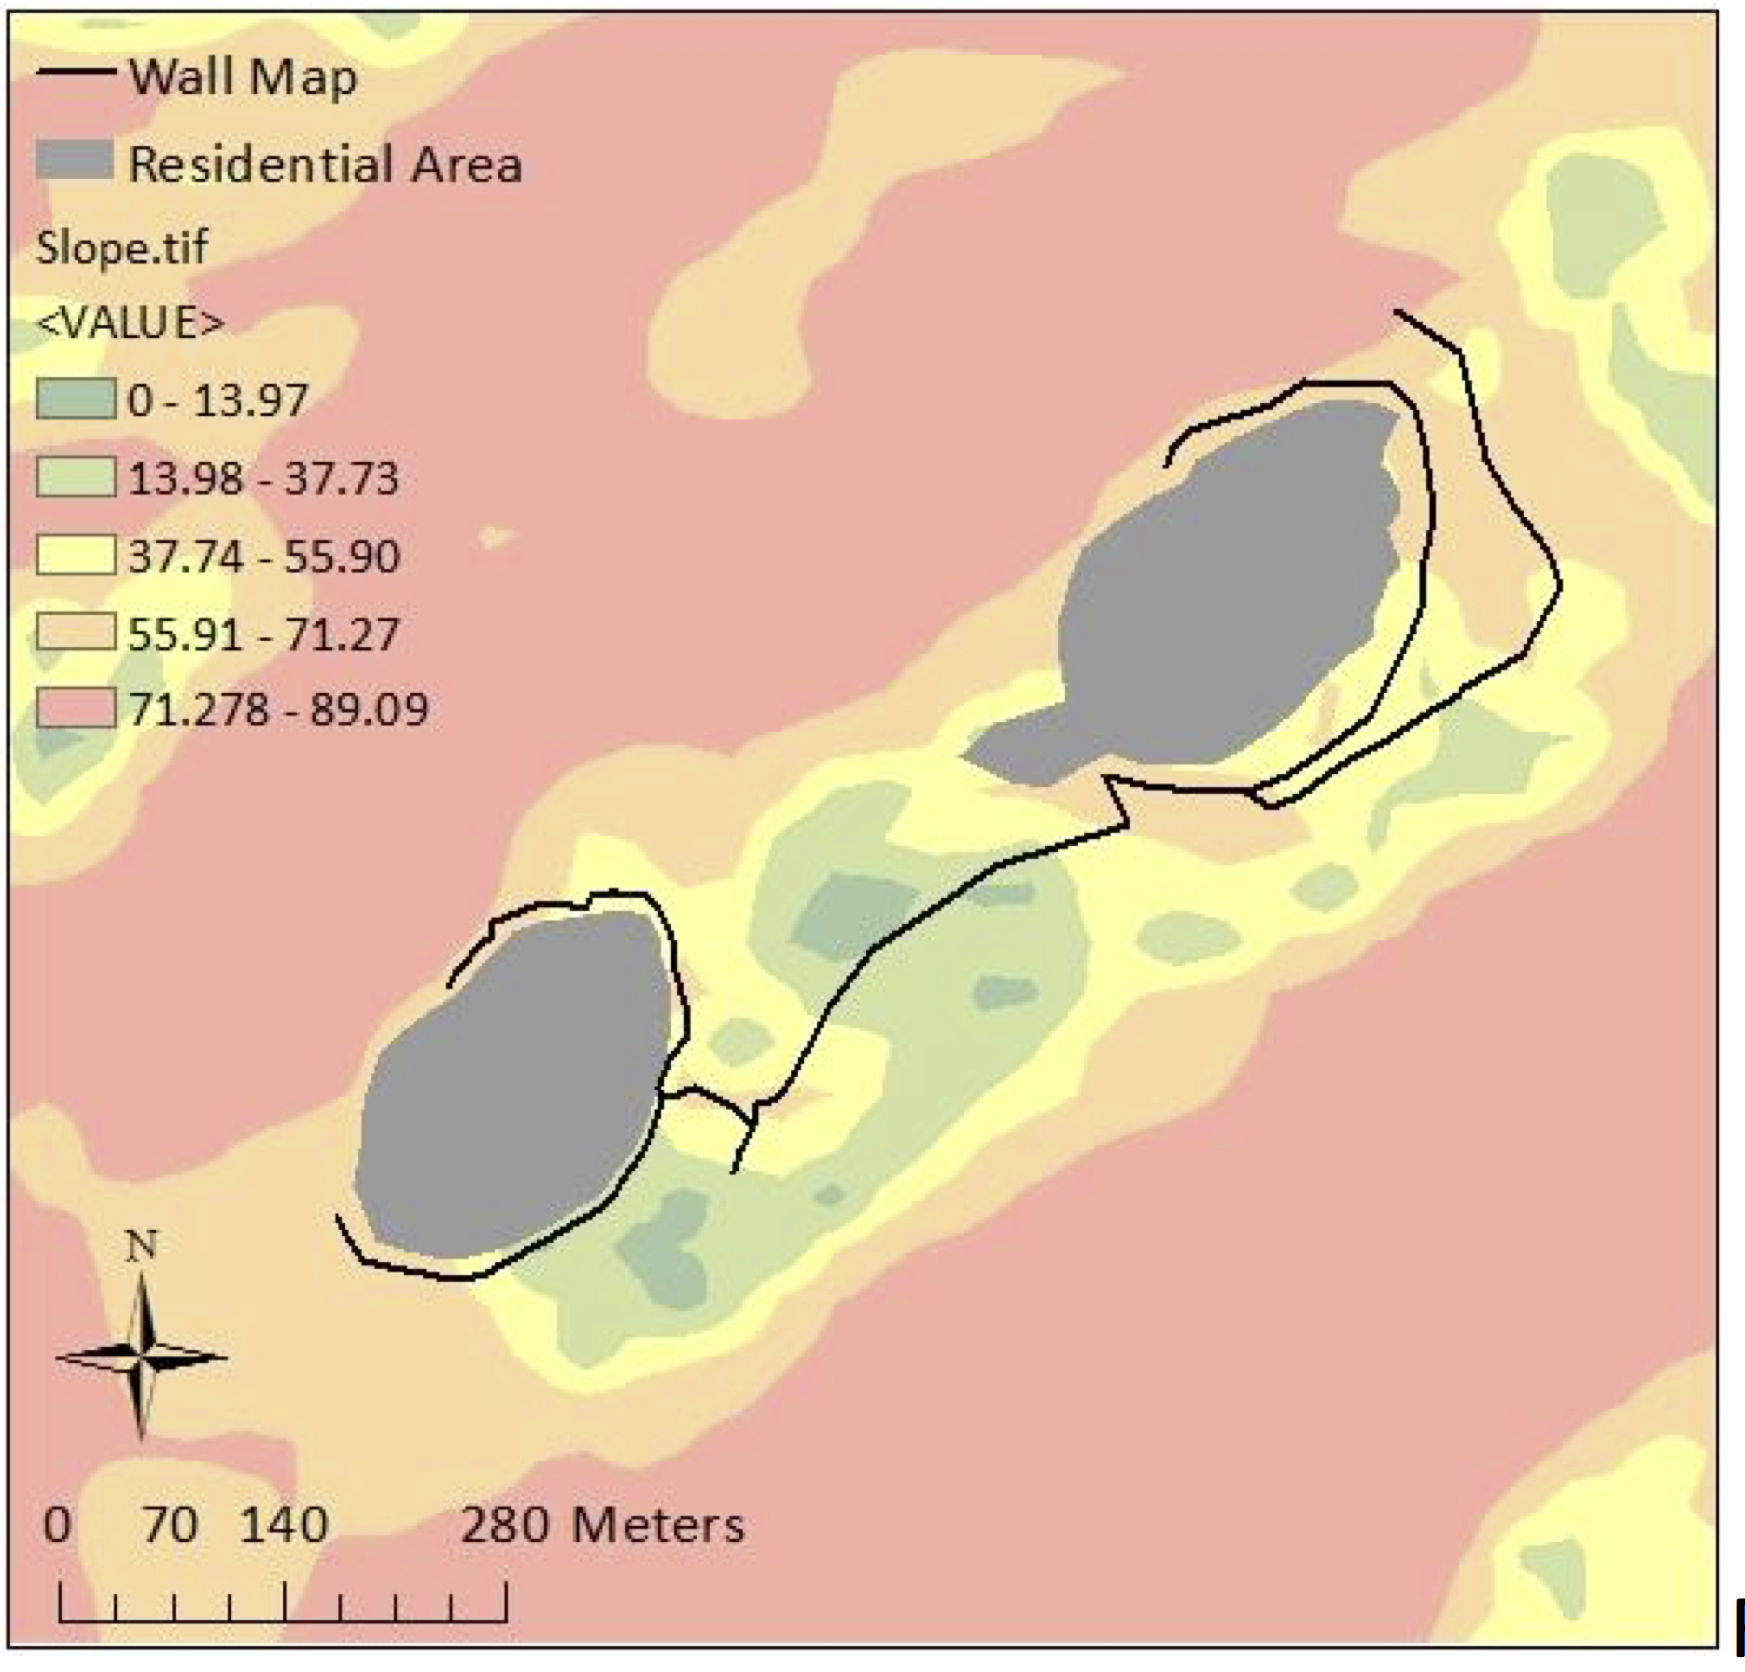
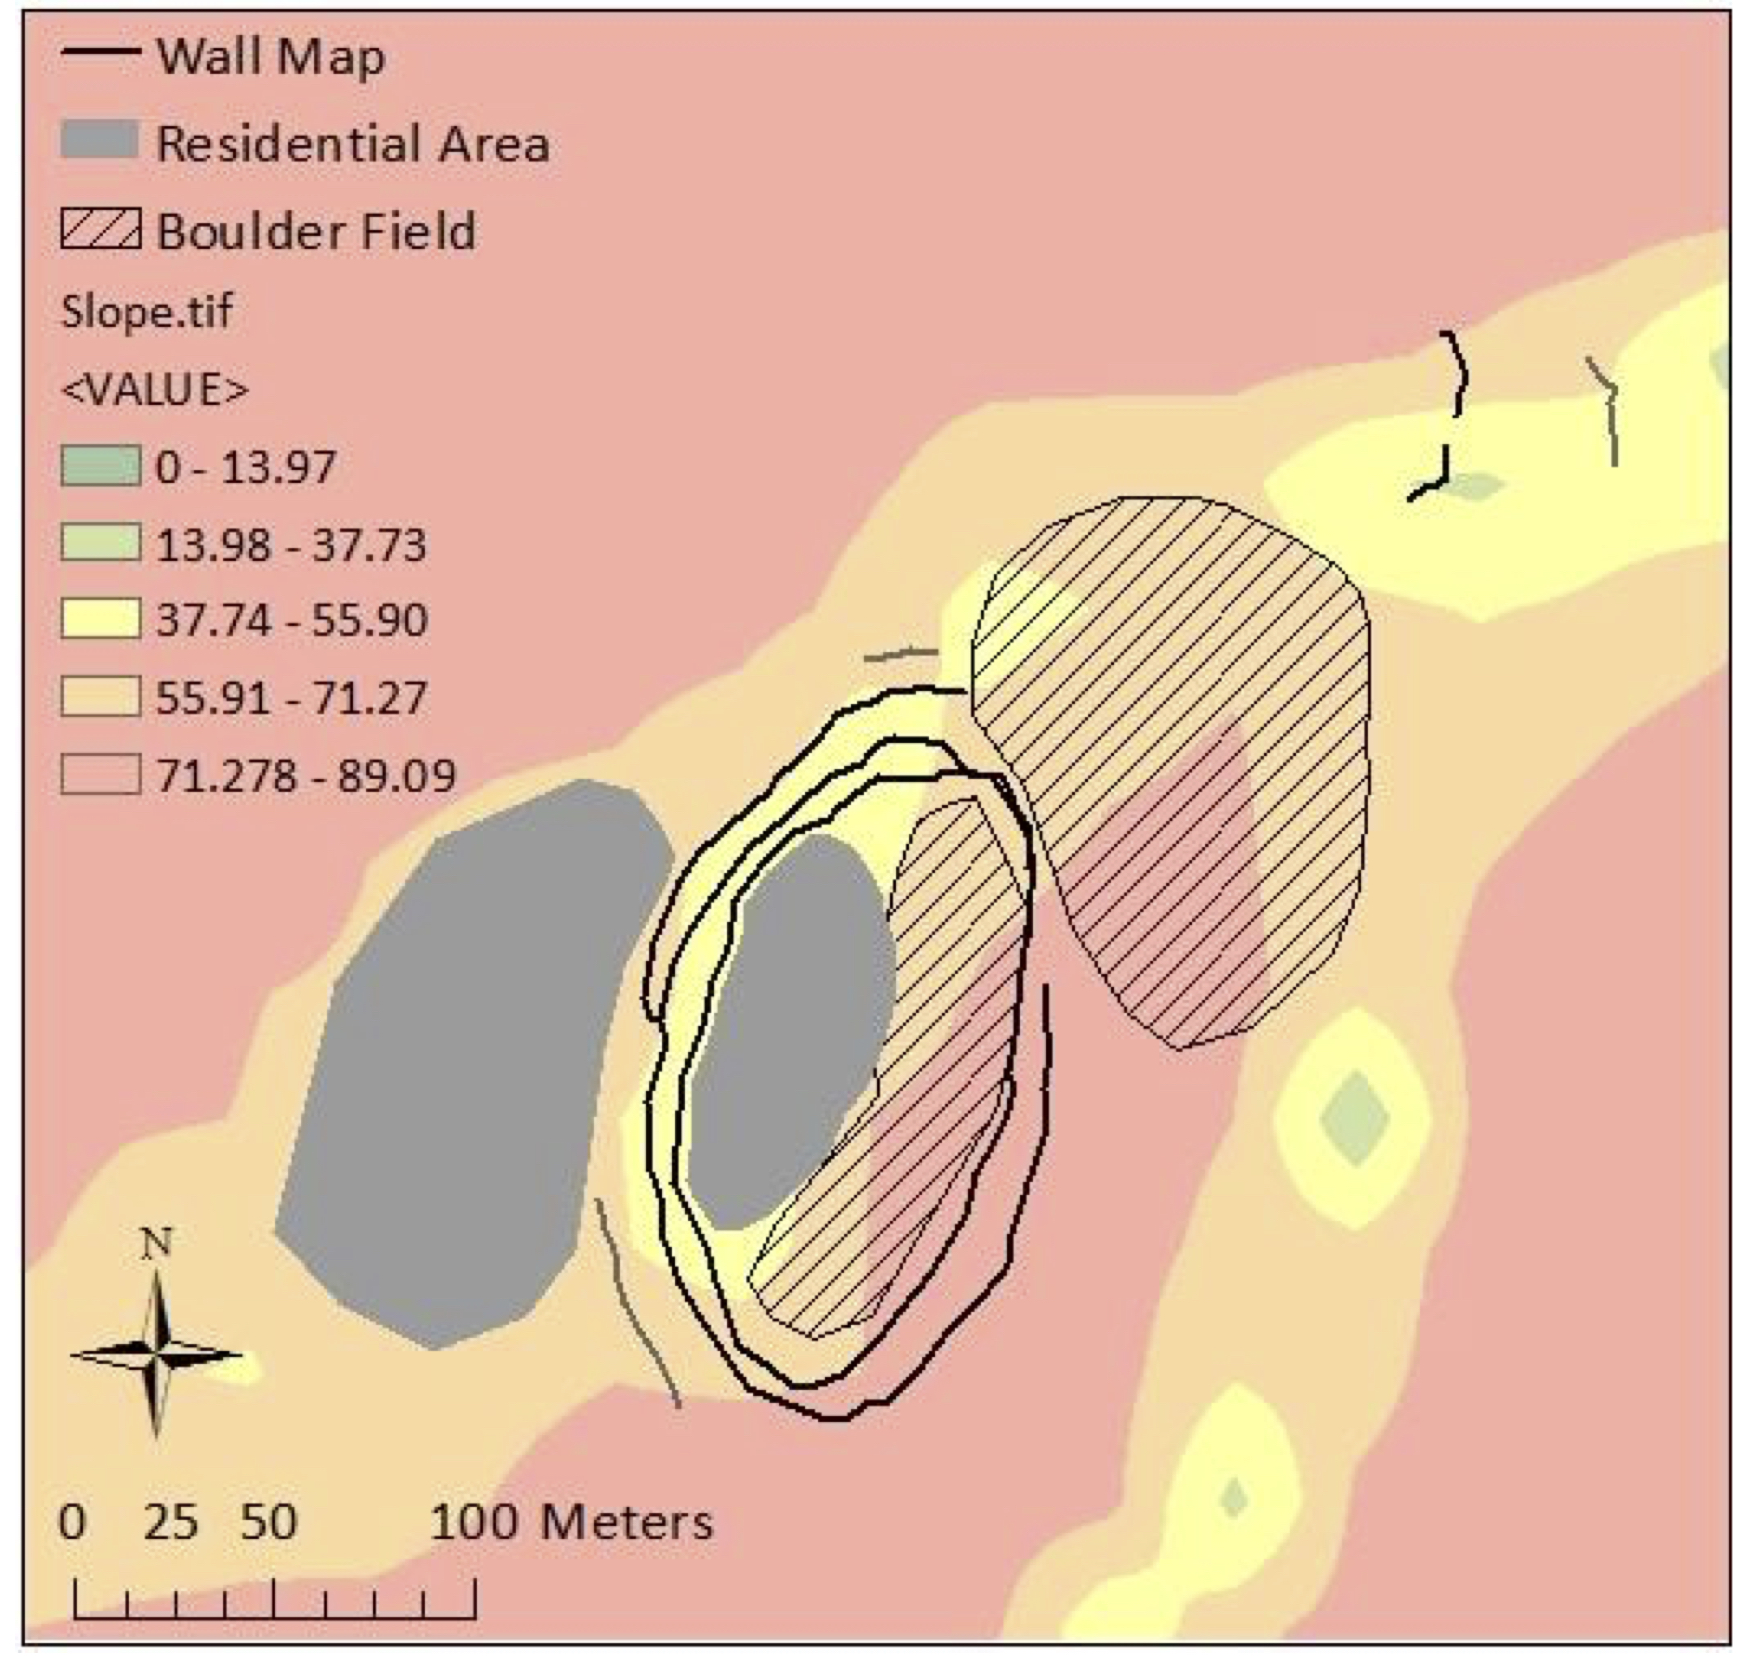
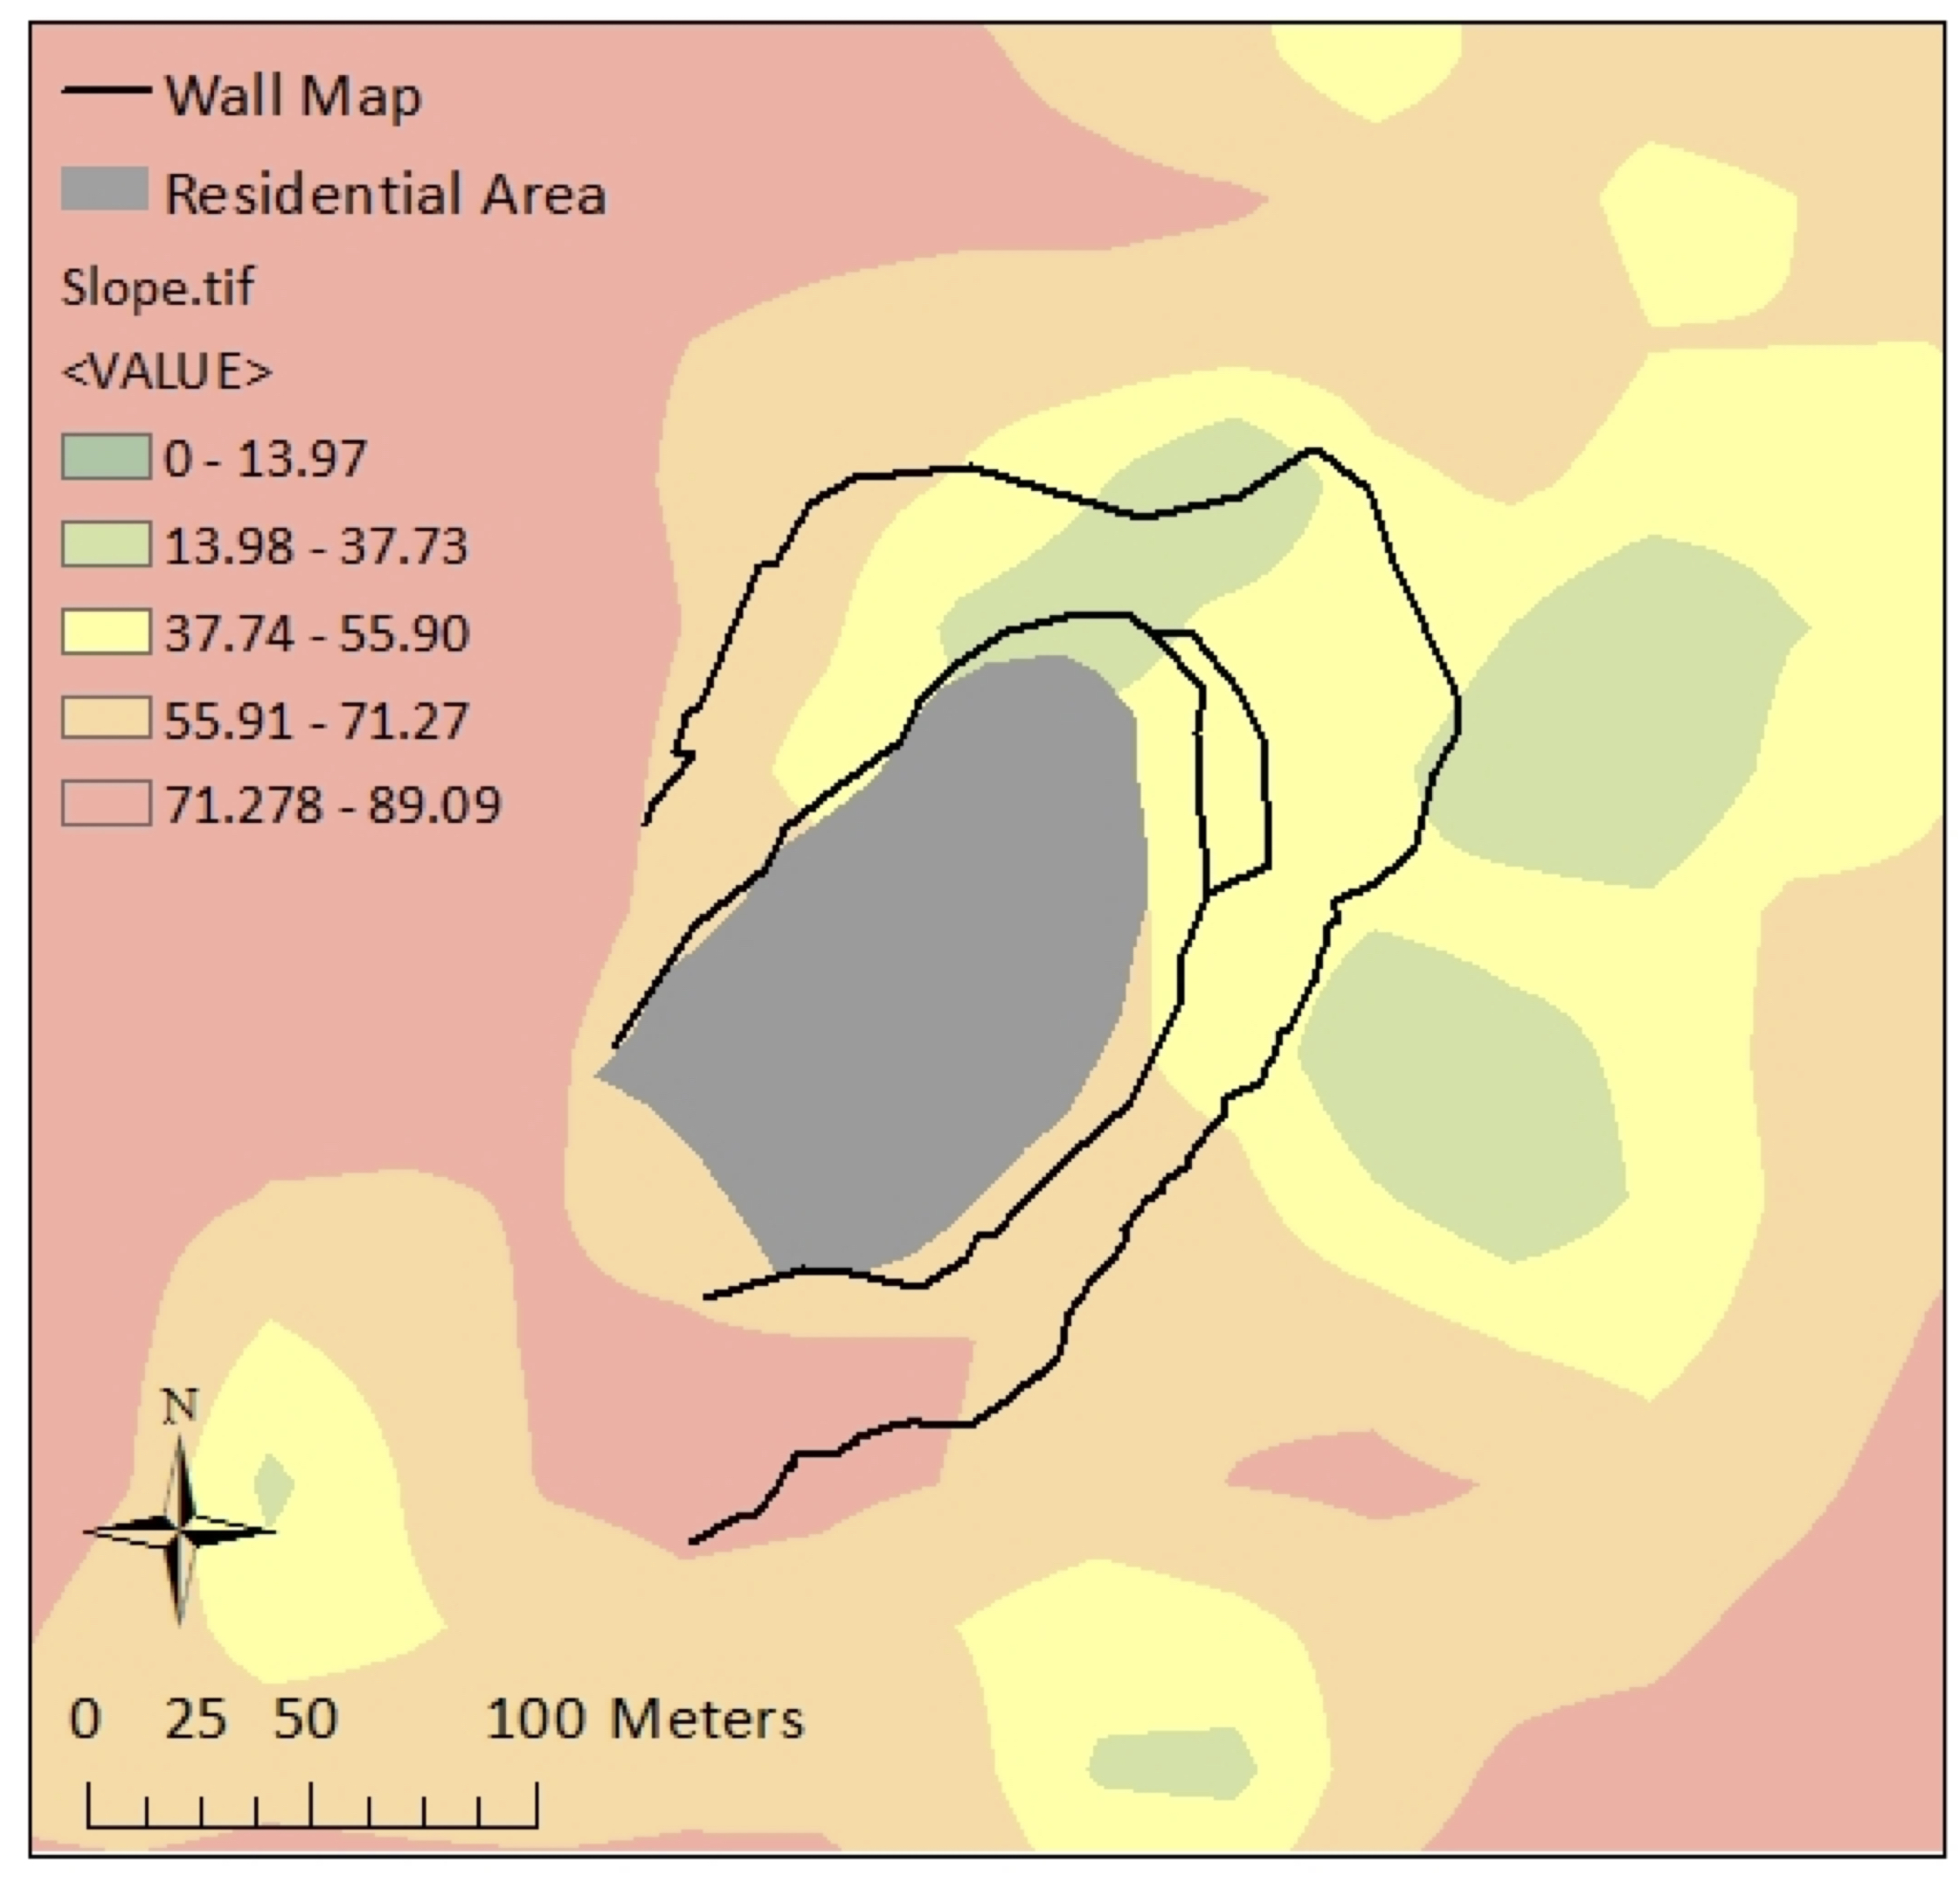
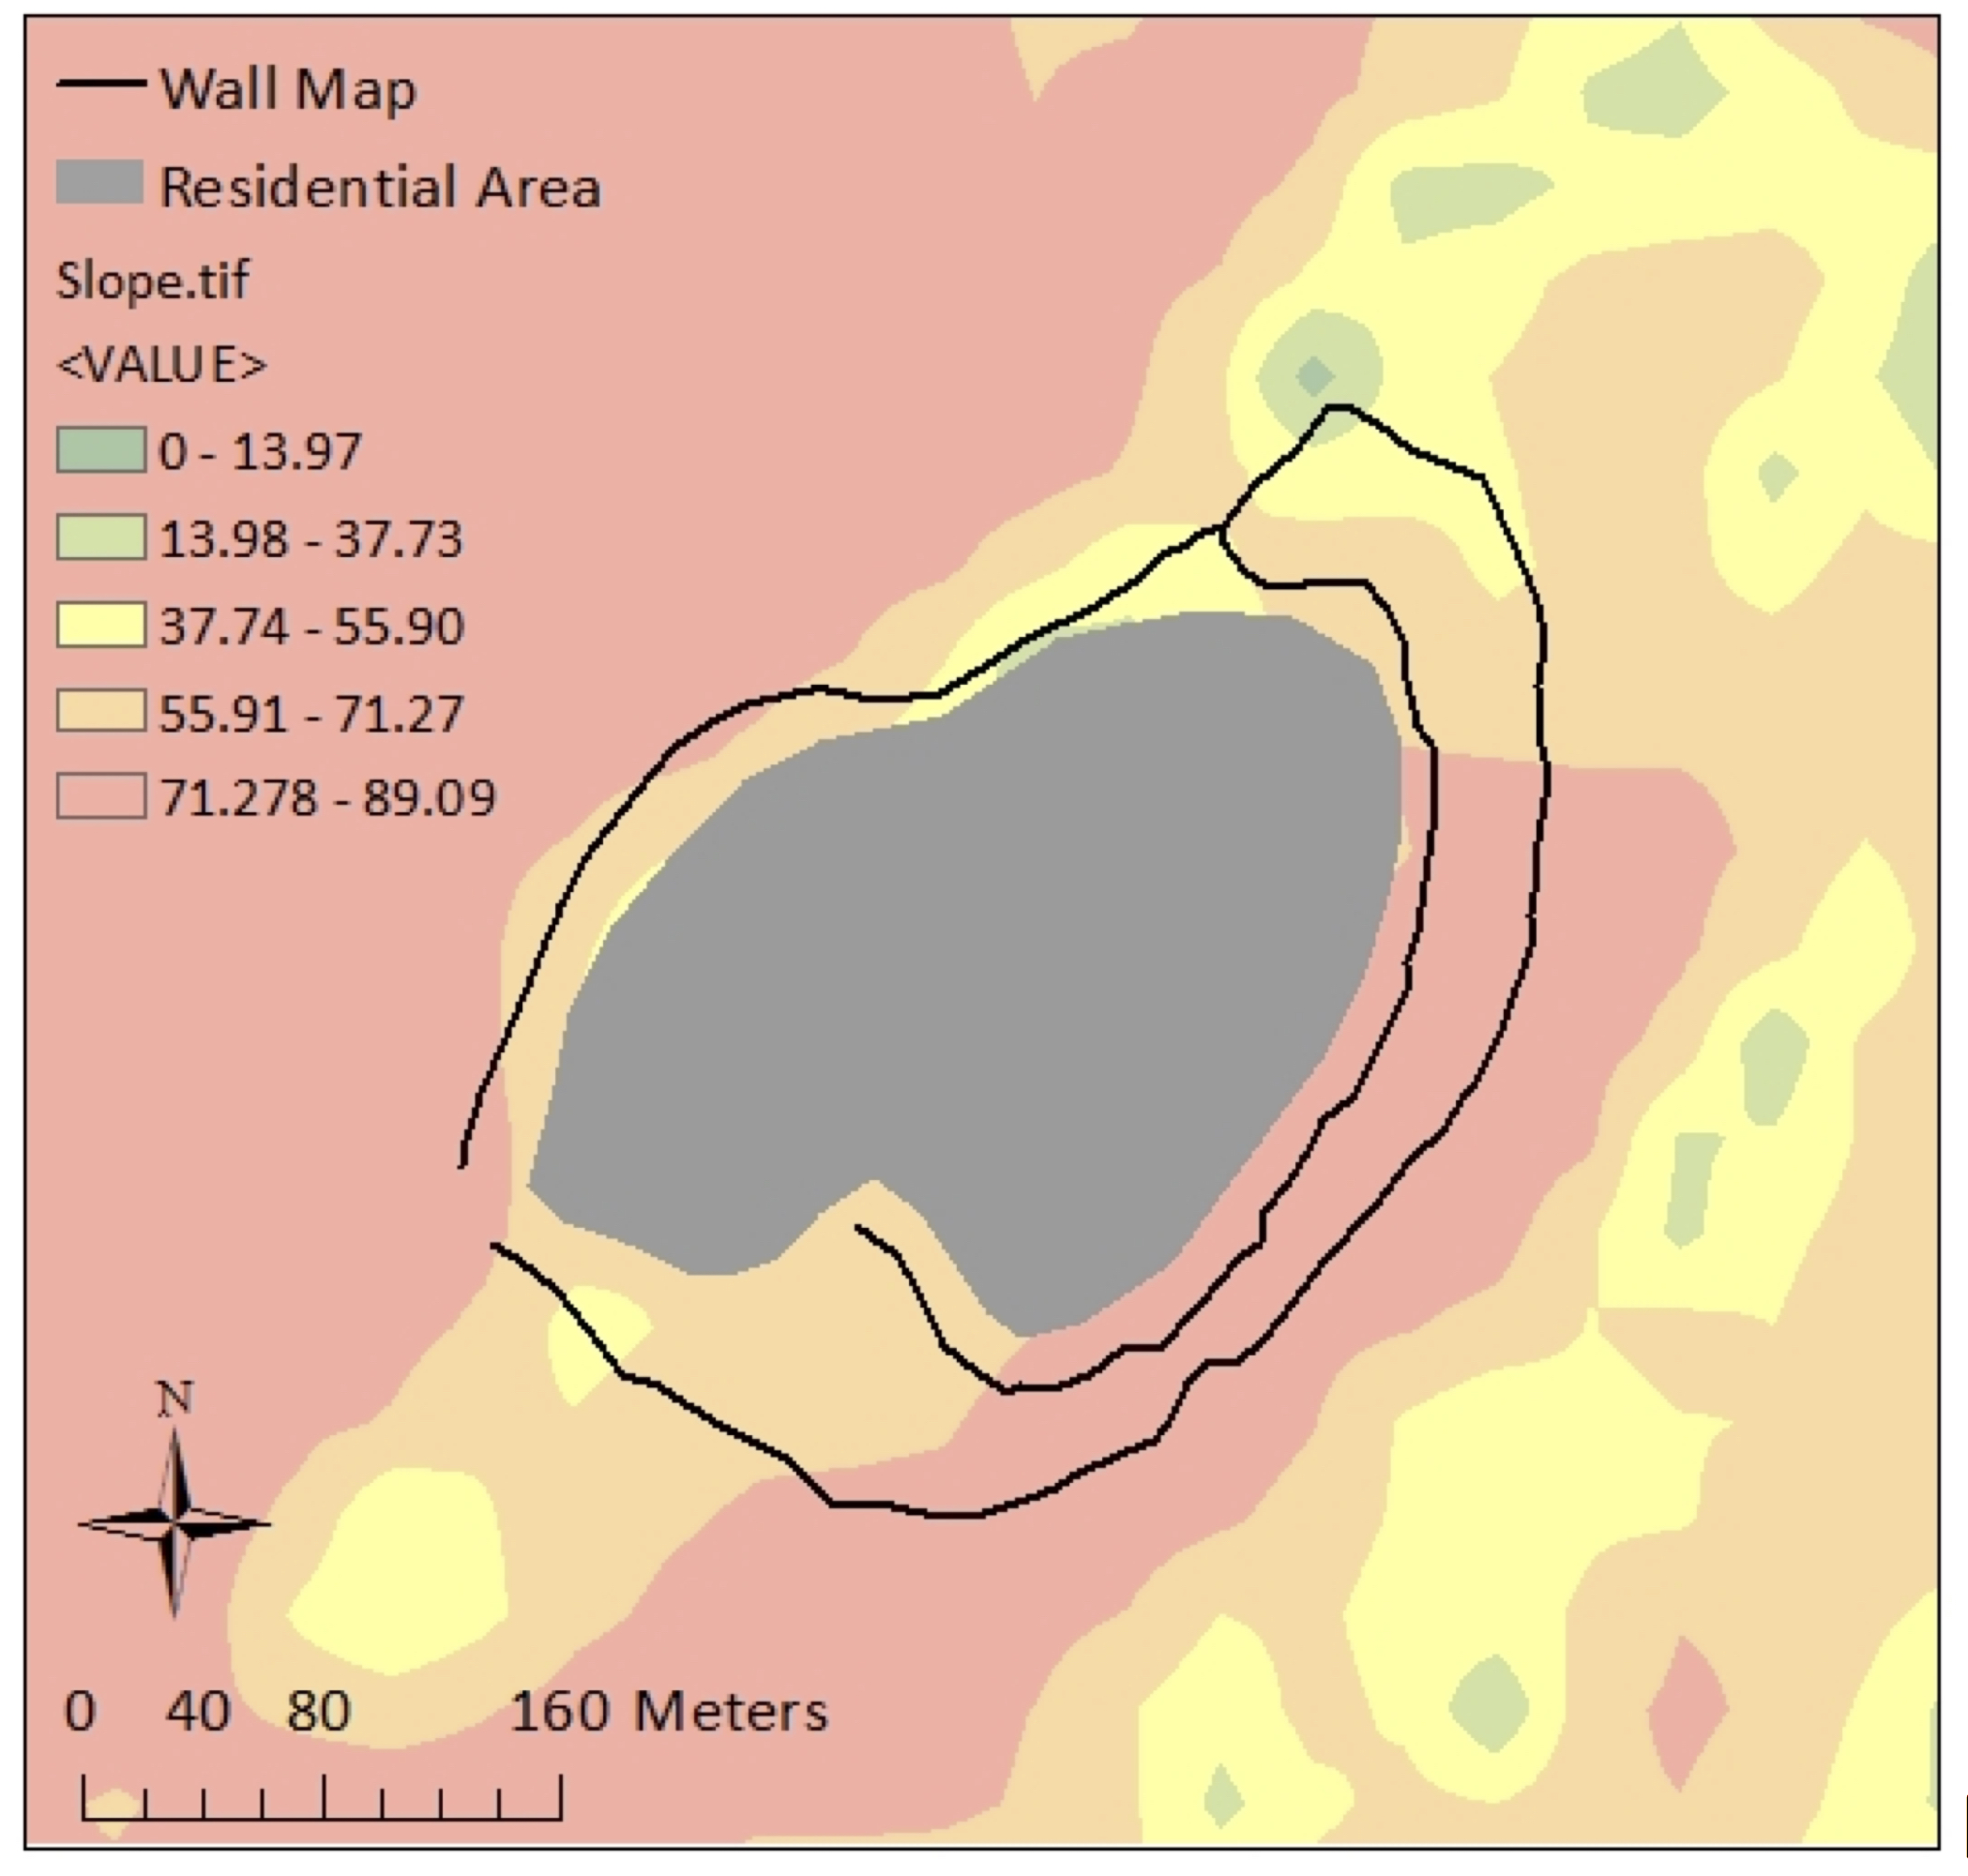
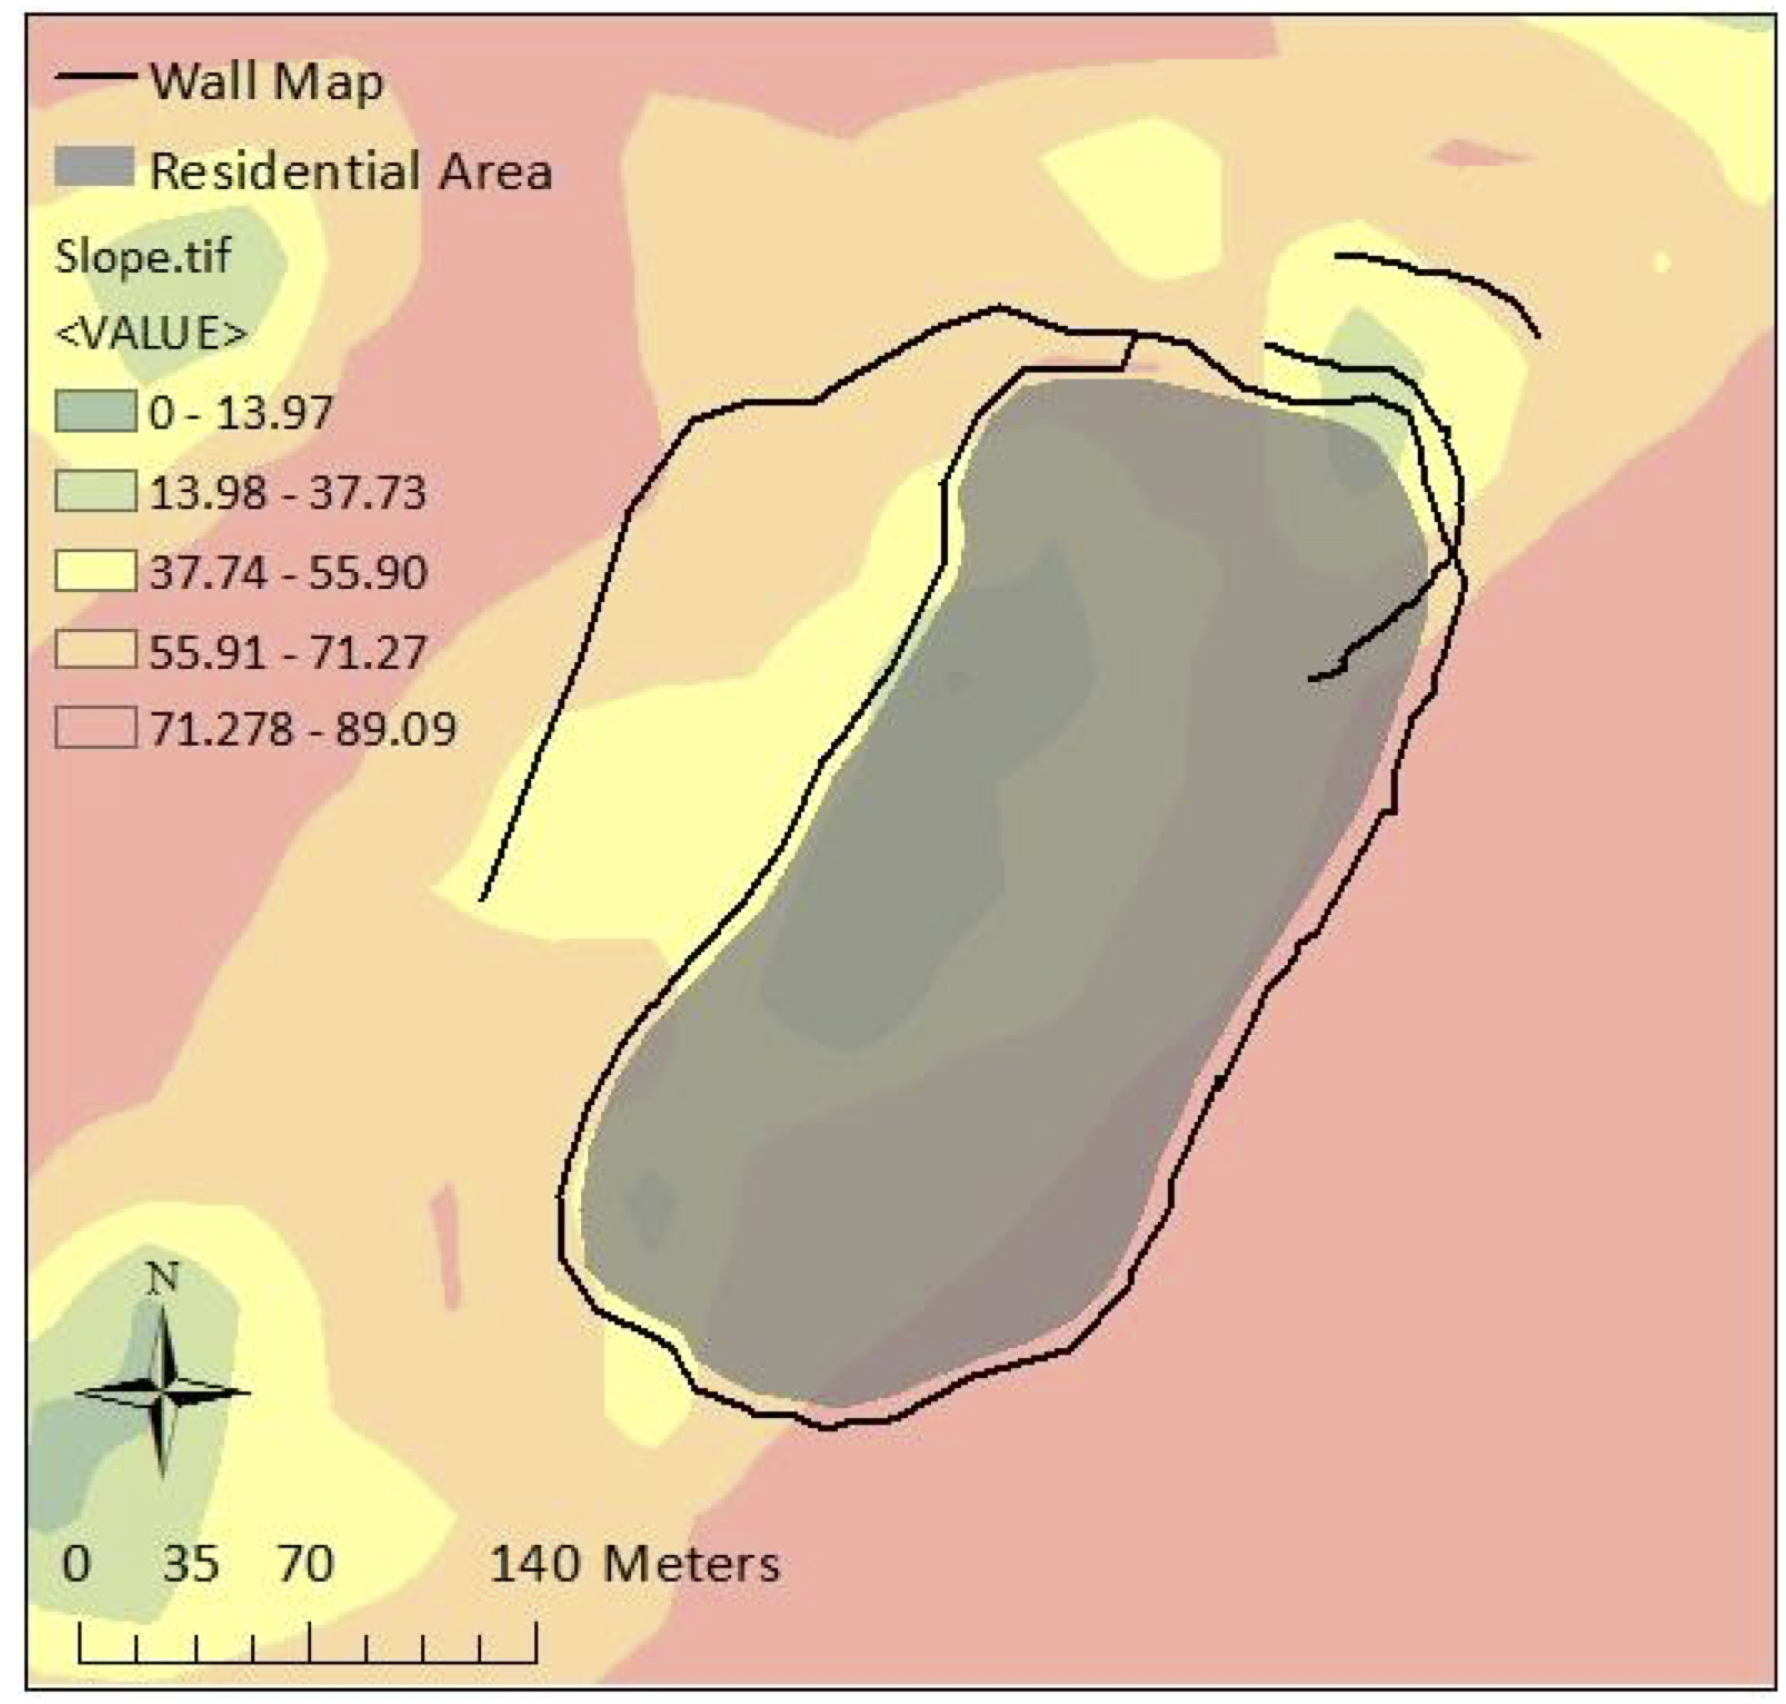
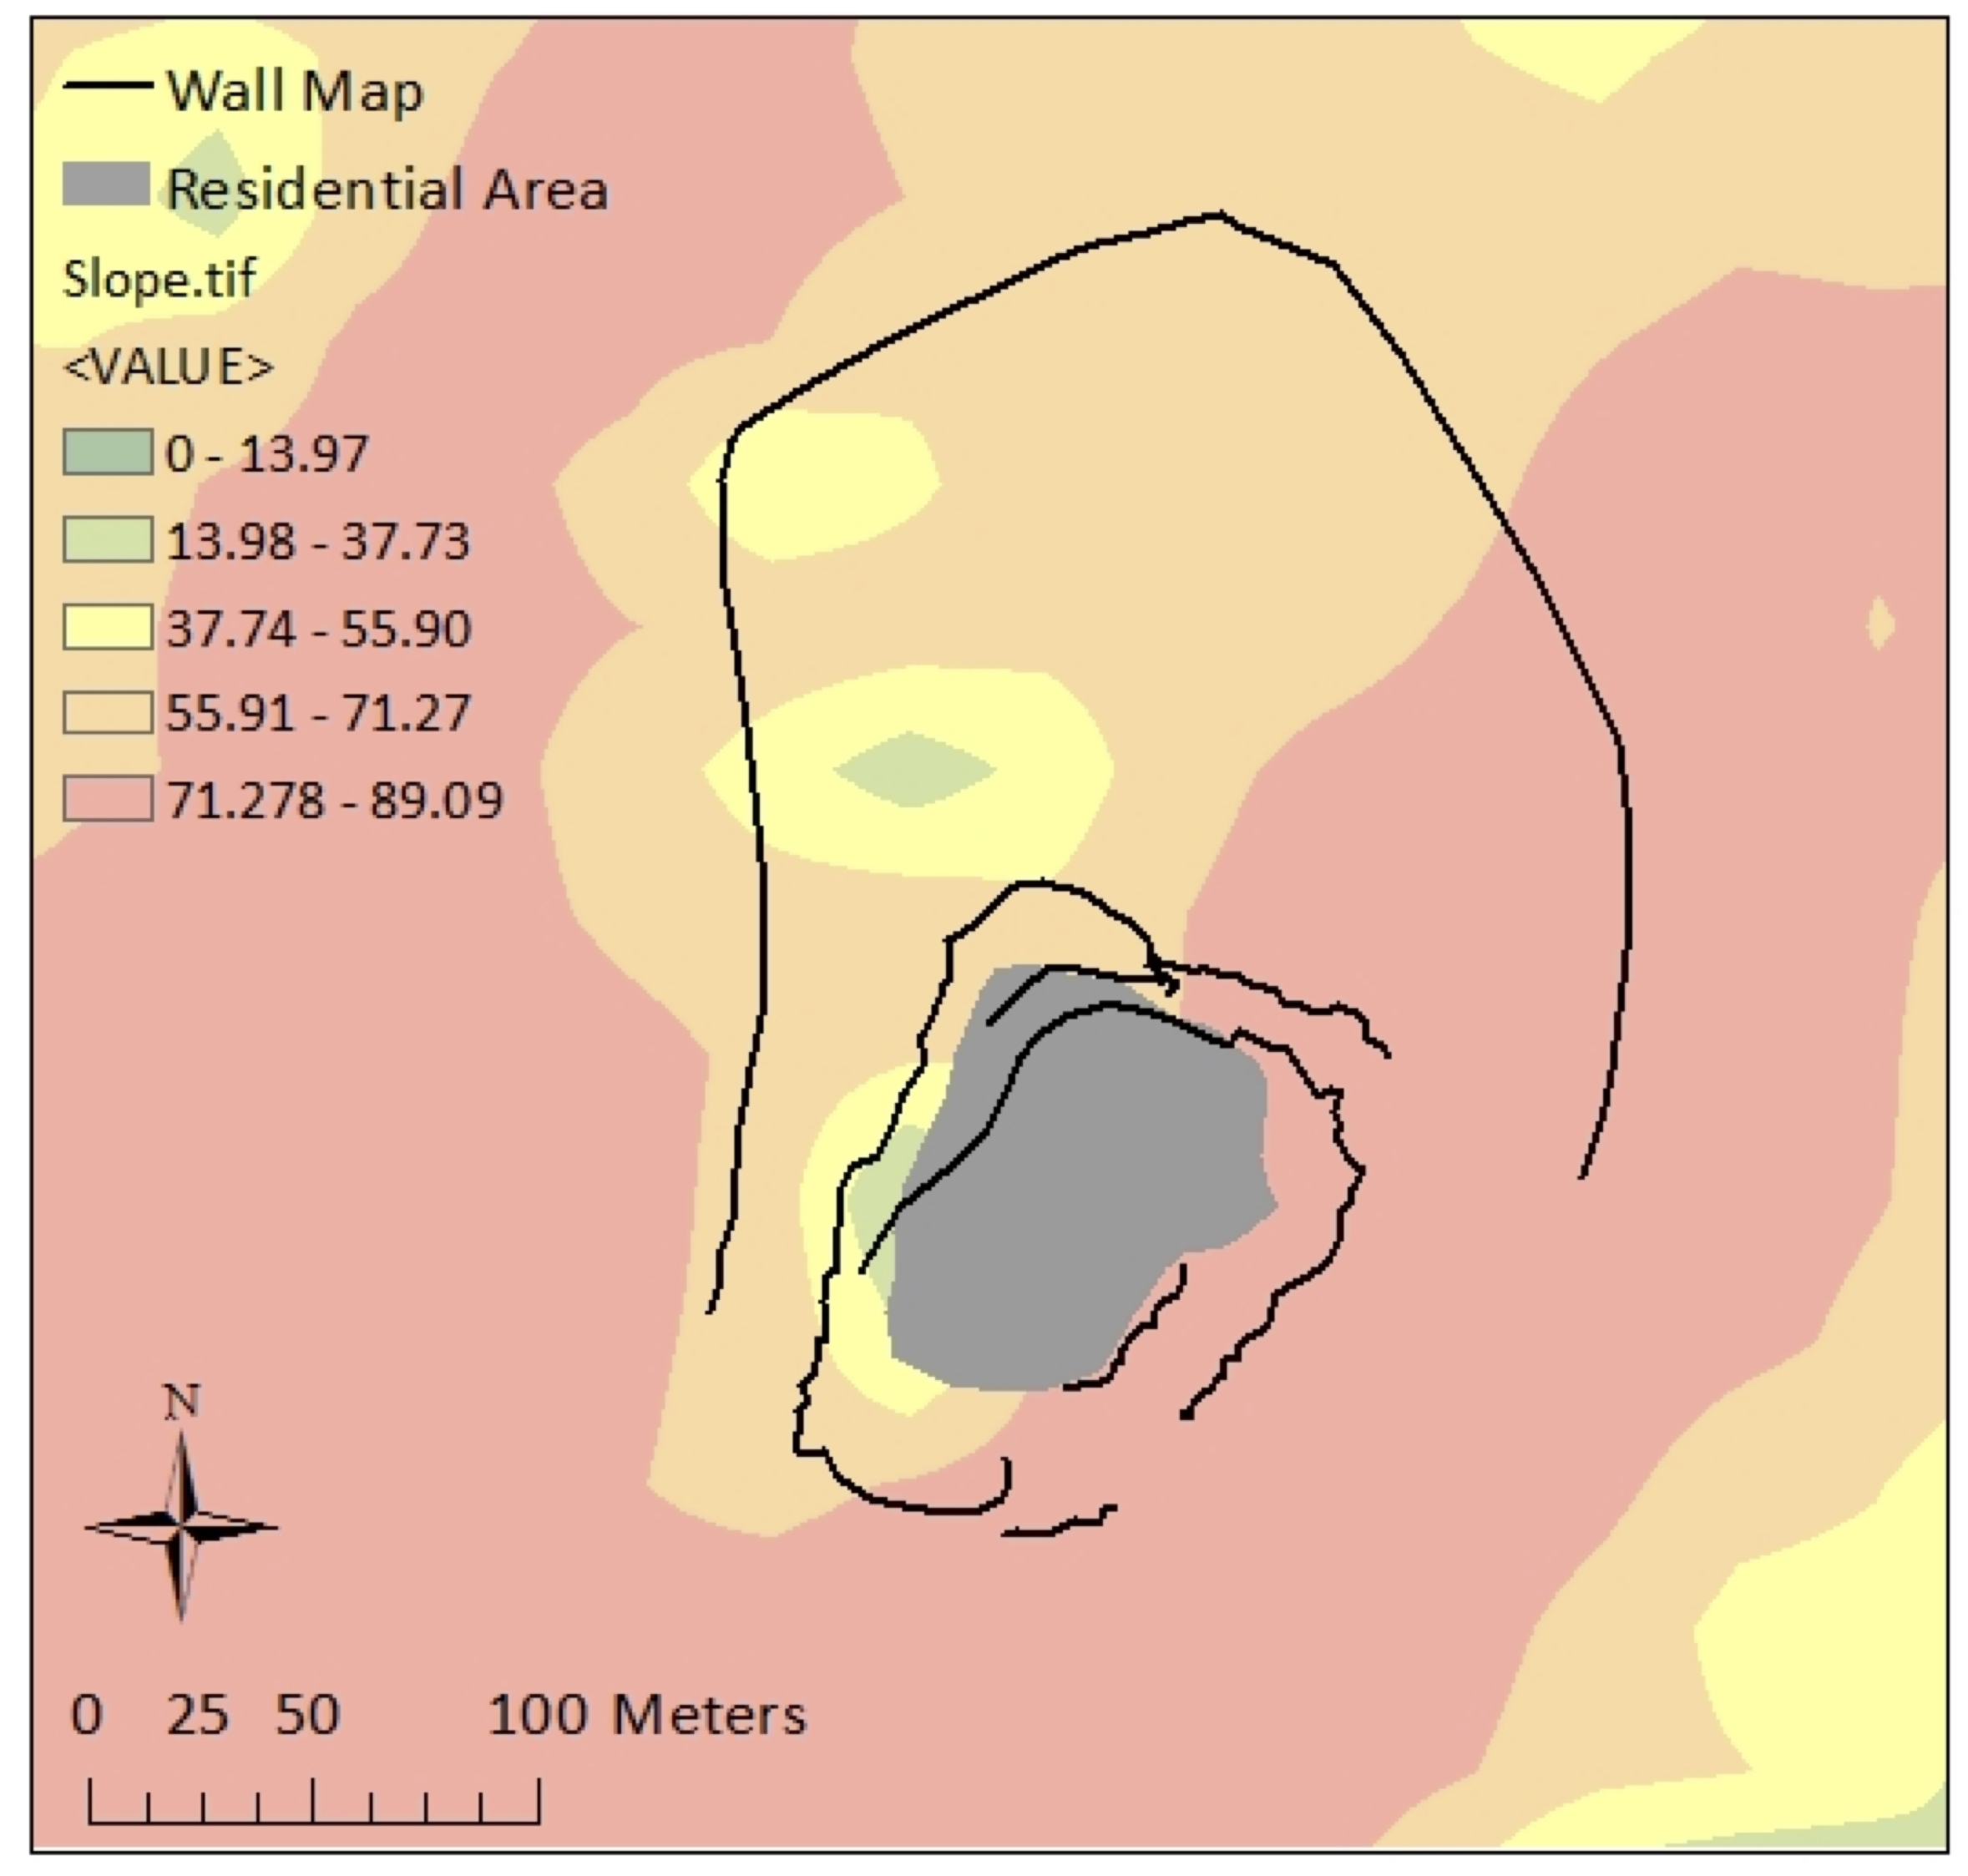
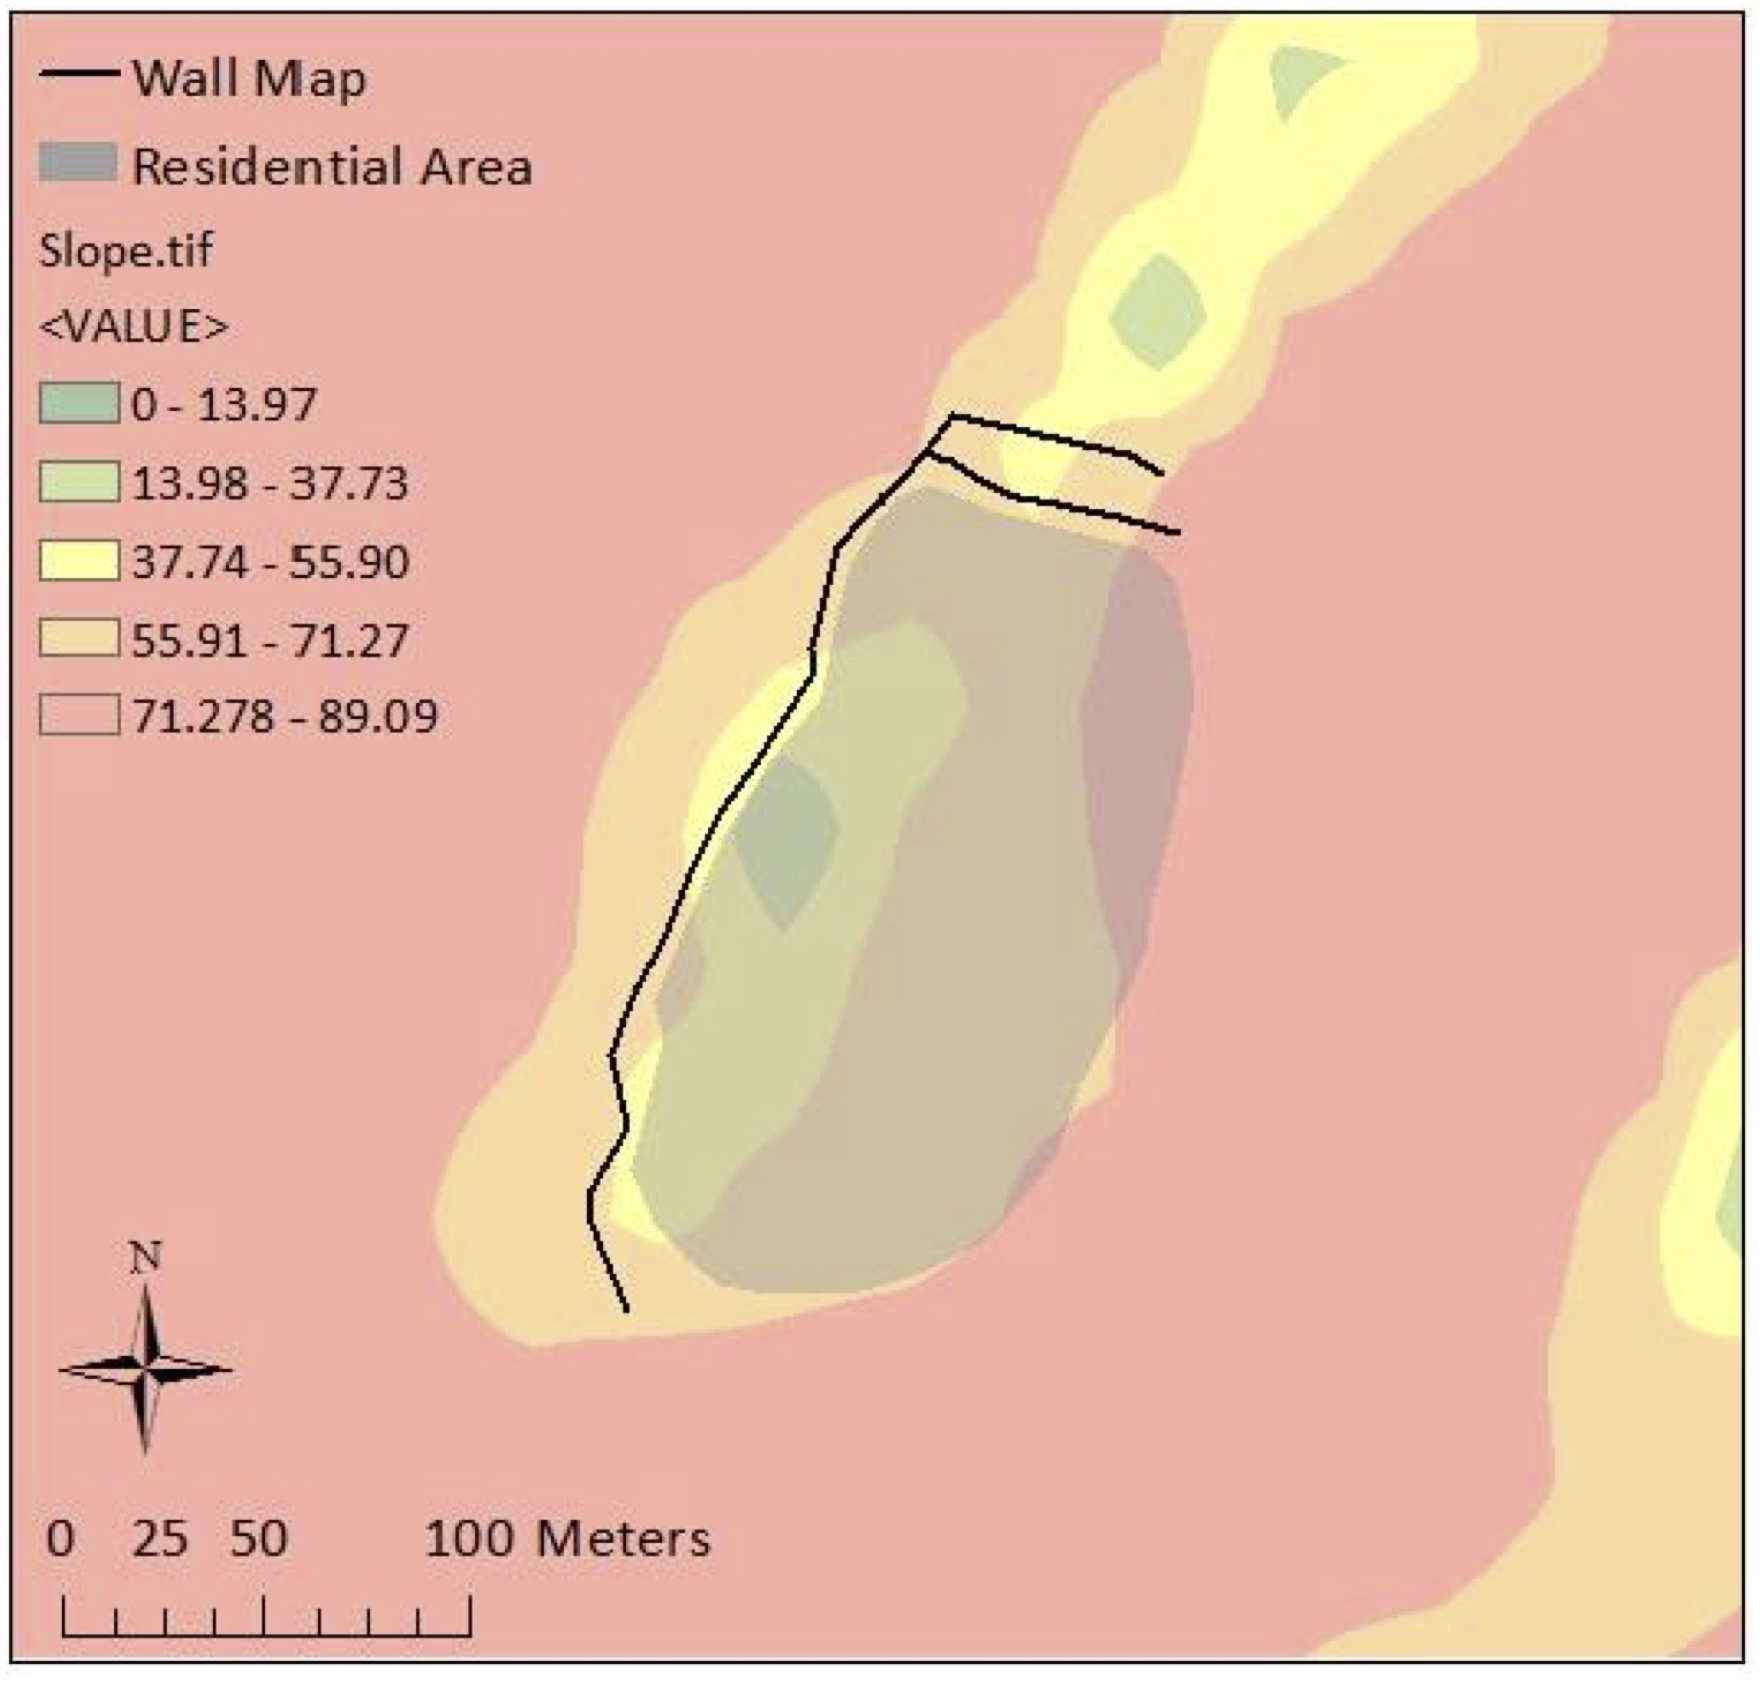
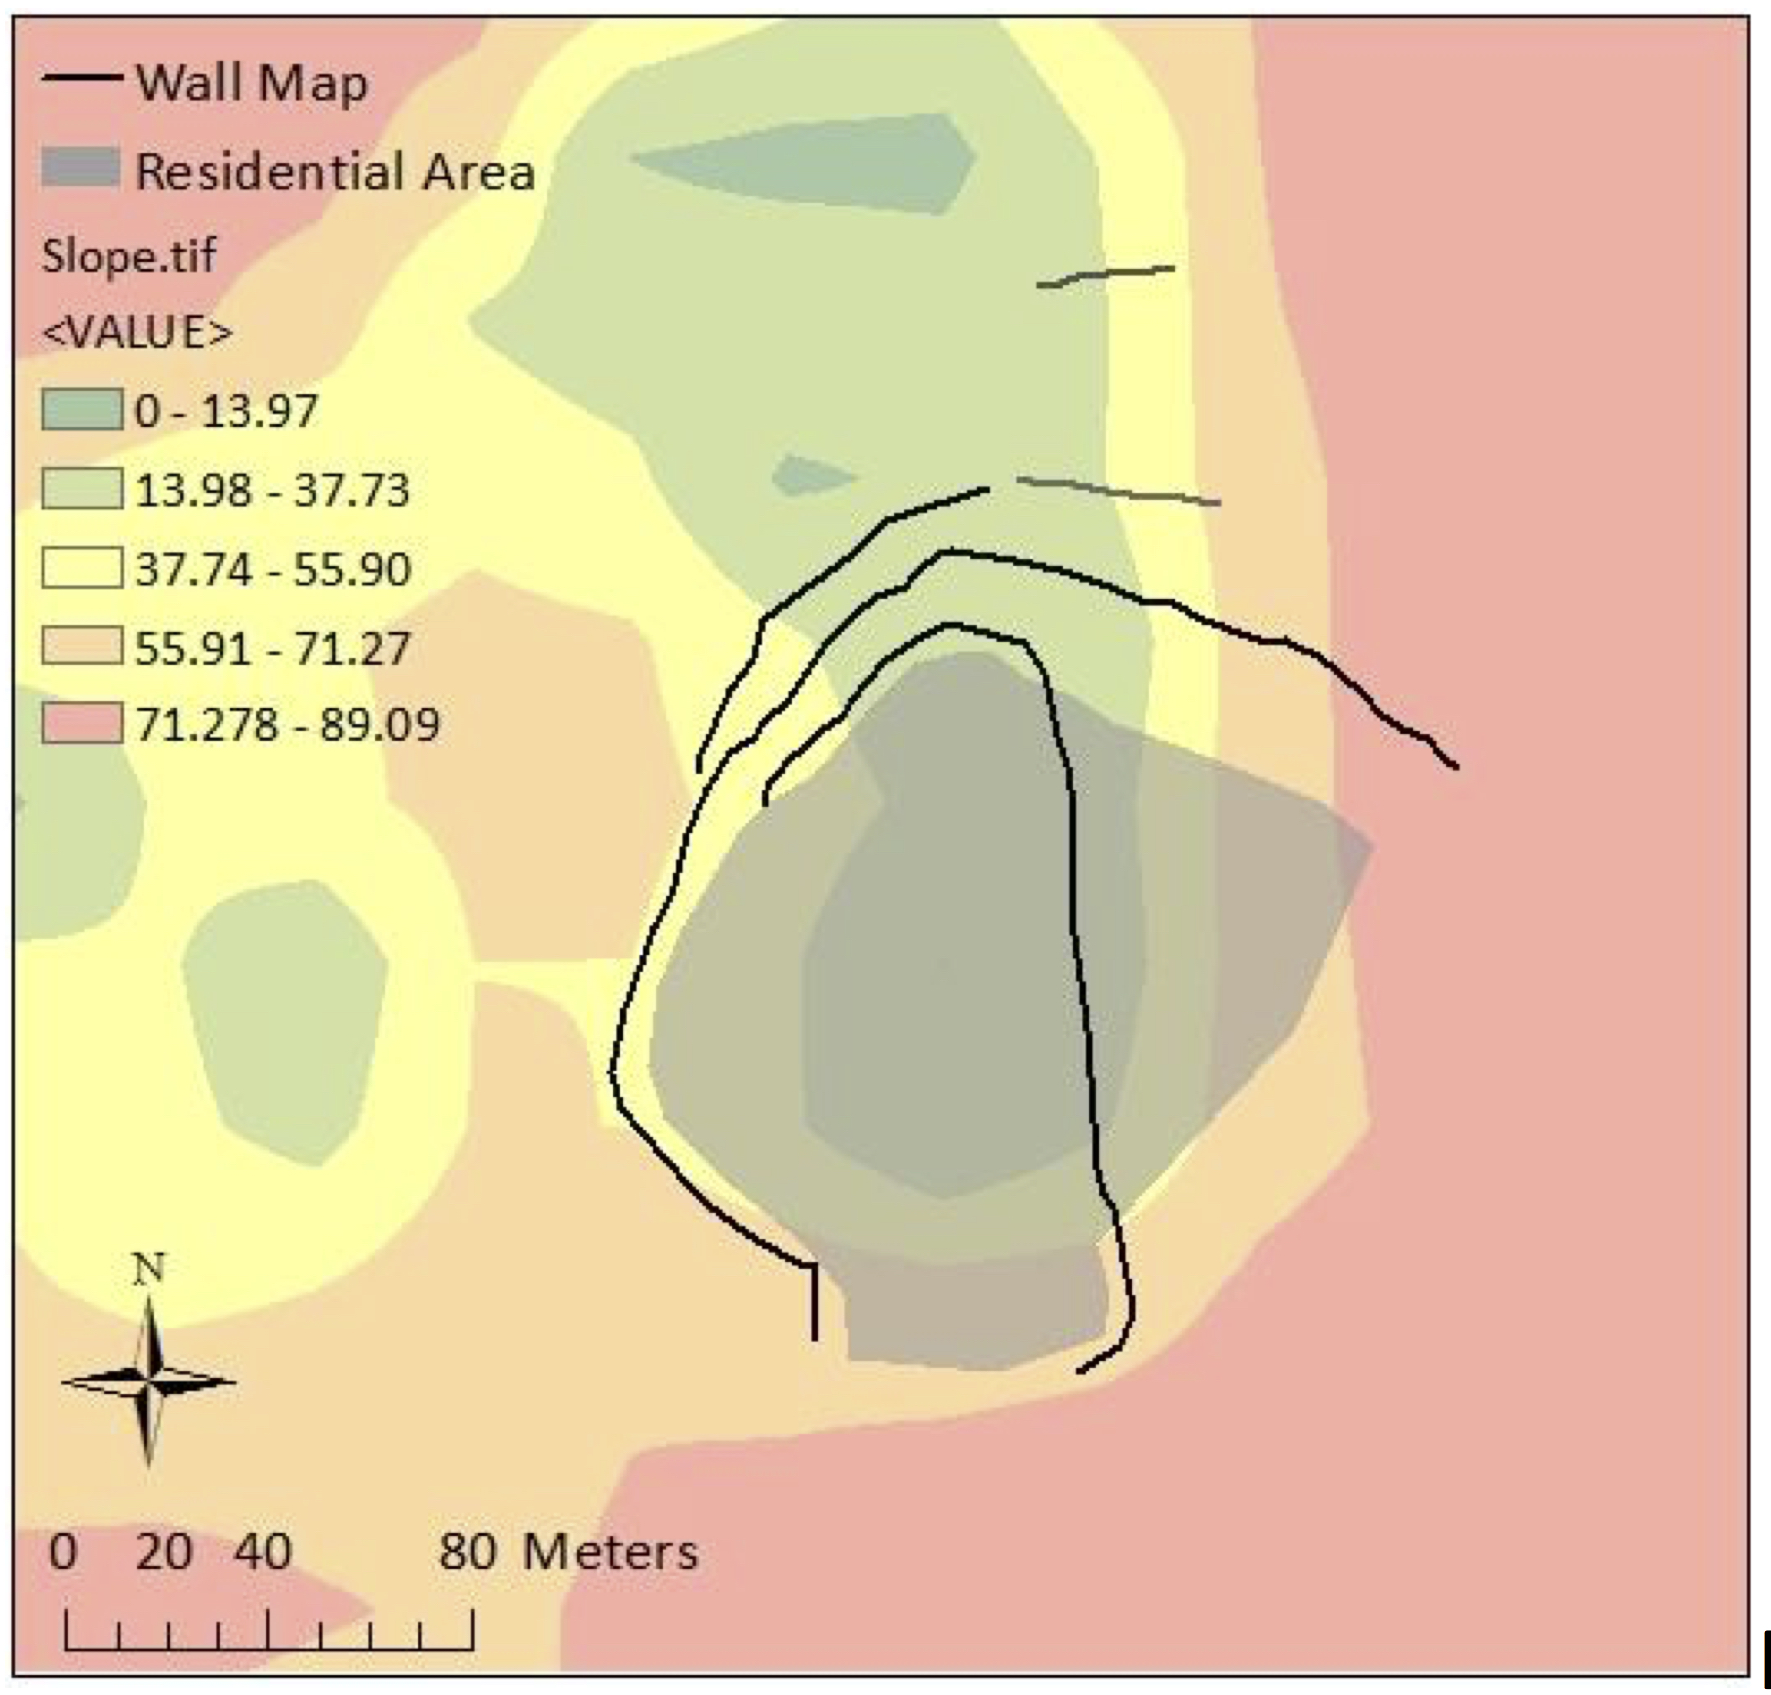
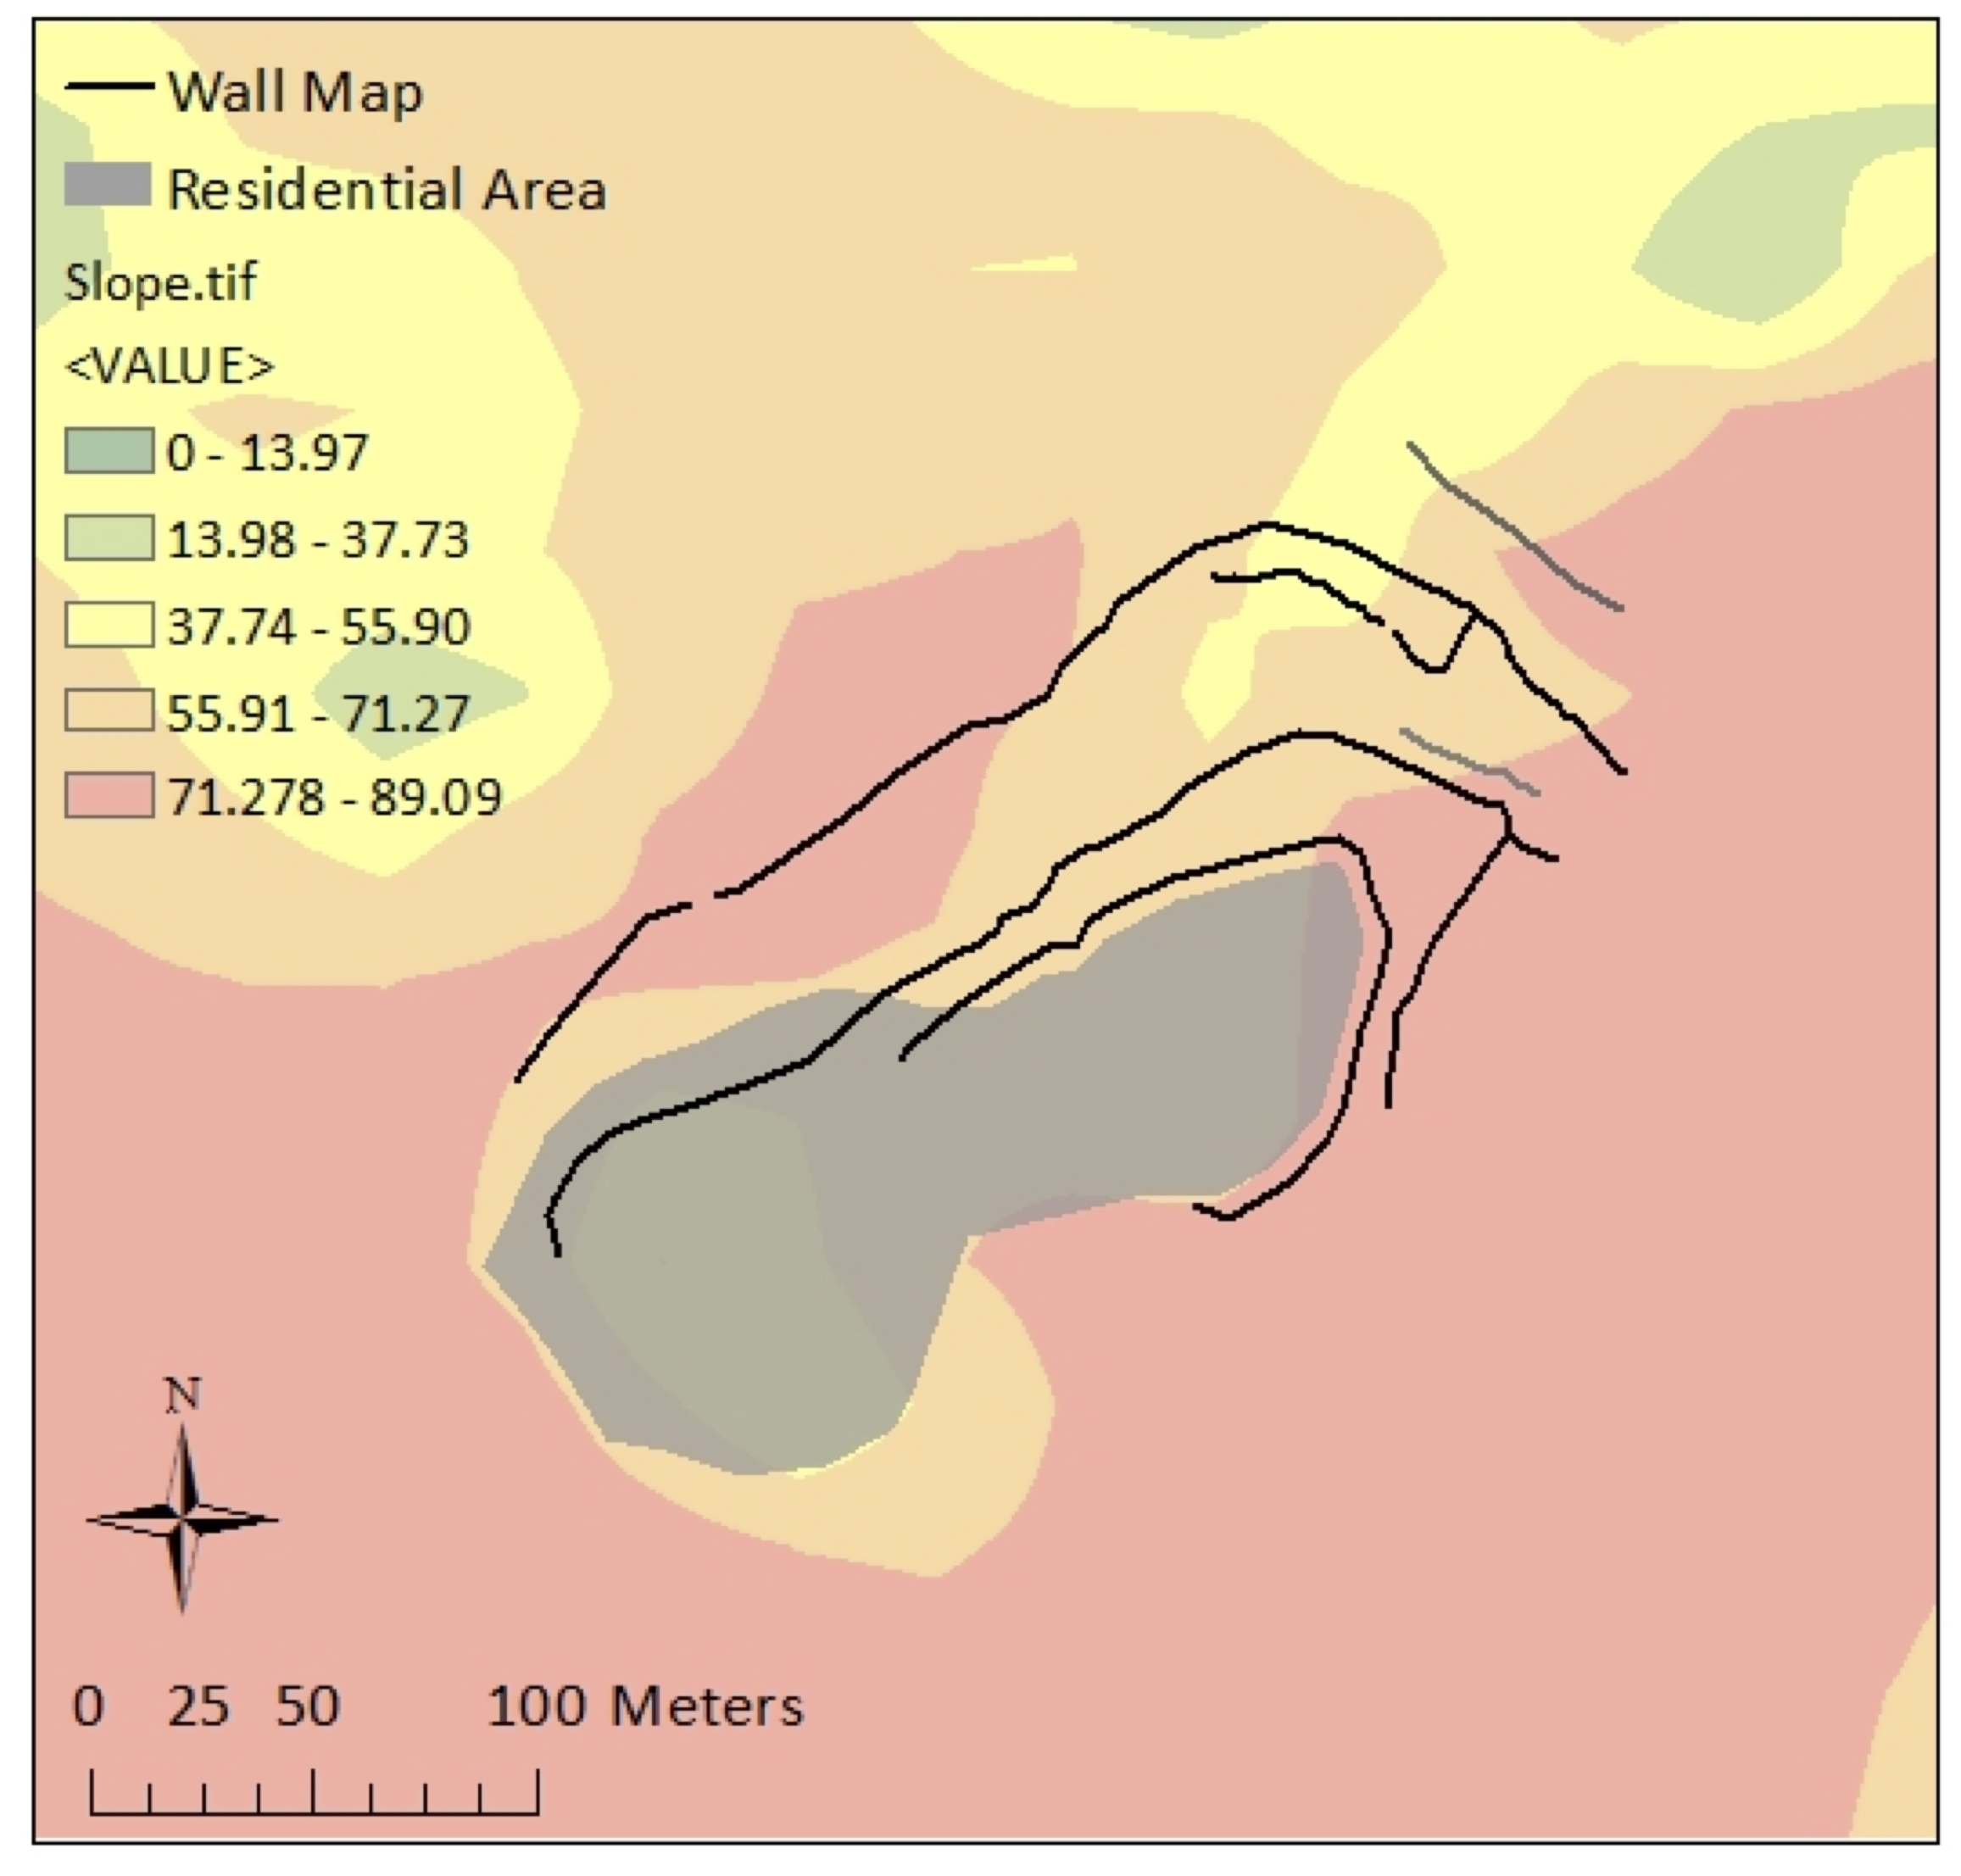
To produce the slope of each subquadrant, shapefiles were created that incorporate the entire area from the innermost defensive feature to the furthest extent of the buffer (indicated by the hatched areas in Figure 8). The average slope for each of the shapefiles was calculated in degrees from 0 to 90 using Zonal Statistics in ArcMap 10.2 to form a quadrant's slope score. The wall and residential sector maps of each hillfort are presented along with the slope raster in the supplemental materials (Supplemental Figures 1–12). If intrasite variation in fortification is a function of accessibility, I expect the FS to be predicted by SS. To test this relationship, correlation and ordinary least-squares (OLS) regression analyses were performed for each of the hillforts in the sample. Statistical tests were run separately for each hillfort in order to identify which sites met the test expectation and which did not.
Results
Results demonstrate that the majority of hillforts in the region (9 of 11) exhibit strong or significant negative correlations between SS and FS (Table 1). These results indicate that as slope increases, fortification decreases—a pattern that meets the expectations of the explanatory model. The results of the OLS regression analysis reveal similar patterning, with SS being a significant predictor of FS for the majority of hillforts (8 of 11). Two hillforts did not meet the model's expectations: Chuluja and Cerro Anamarca. Chuluja is also a significant outlier in all subsequent analyses, suggesting this hillfort did not undergo the same defensive processes as the rest of the hillforts in the region. The reasons for this exception are as yet unclear. Cerro Anamarca appears to exhibit the most defensive features along the least accessible sector of the settlement. This deviation from the broader regional pattern may be the result of historic and modern development, which is clustered on and around the easiest approach to the site and may have destroyed several defensive features in that area. It is also possible that residents of Cerro Anamarca had factors other than slope in mind when constructing their defenses. What is clear is that accessibility, as measured by SS, is the best predictor of intrasite variation in fortification across the region as a whole—supporting the expectations of the model that intrasite variation in fortification is driven primarily by accessibility.
Results of Pearson's r correlation (r) and OLS regression (r², p-value) analyses. white = weak relationship, Light gray = strong relationship, dark gray = significant relationship.

Intersite Fortification Analysis
An equally important question is why some hillforts are more heavily fortified than others. Of the hillforts investigated, several contain three to four defensive walls in quadrants with the easiest approach (Cerro Chillca and Ayapata), while others contain only one or two defensive walls (Cerro Pucara and Cerro Ayapata). Additional analysis was required to explain this variation in intersite fortification.
Three explanatory models have been proposed from different regions of the world to account for intersite variation in fortification. The first model was produced by Elizabeth Arkush (Reference Arkush2011:150–151), who found that intersite variation in fortification was driven largely by differences in population size among LIP hillforts in the Lake Titicaca Basin. The most heavily fortified sites had large populations that could be mobilized to build and maintain fortifications. Smaller settlements invested less in defenses because they could rely on alliances with larger neighbors who rallied to their defense when under threat. The second model, proposed by Steven LeBlanc to explain variation in Late Period (post–AD 1250) fortified sites of the American Southwest (1999:200–203), also saw population size determining variability in intersite fortification. LeBlanc argues that settlements with the smallest relative population sizes constructed more substantial defensive features to compensate for their vulnerability. Julie Field's (Reference Field1998:46, 51–52) model to account for differences between fortified sites among prehistoric Fijian groups states that fortifications were emphasized among settlements that were located on less defensible landforms near large tracts of arable land, where artificial defenses were required to compensate for the lack of natural defensibility. This model implies that variation in intersite fortification is in part a product of overall accessibility to a site rather than population size. To test whether any of these models apply to the Upper SNR, statistical analyses were conducted using the estimated population sizes of the hillforts and modified FS and SS.
Methods
Unlike Arkush (Reference Arkush2011:148), who had used site size as a rough but effective measure for population size, I use residential area (RA) in hectares for the Upper SNR because the areas between the interior and exterior defensive walls were not occupied. RA is a reasonable and more reliable metric due to the dense clustering of houses within the defensive confines, and the lack of residences outside nucleated centers. A summed fortification score (SFS) and average combined slope score (CSS) were produced to account for differences in fortification and accessibility between hillforts. The SFS is calculated for each hillfort by totaling the values of each site's subquadrants fortification scores. The CSS for each hillfort is the average of all of the site's subquadrants slope scores. These methods provide single fortification and slope scores for each site, permitting intersite analysis to be conducted. Using these methods, it is possible to test which, if any, of the above models explain the variation in intersite fortification in the Upper SNR. If the expectations of a model are correct, I expect to see strong or significant relationships between one or more of the independent variables (CSS and RA) and the dependent variable (SFS).
The first test will determine whether population size drives intersite variation in fortification. I expect that either (1) as population sizes increase, the amount of fortification features will also increase at each site (Arkush model); or (2) as population sizes increase, fortification scores will decrease (LeBlanc model). The second test will determine if increased overall accessibility is driving variation in intersite fortification (Field model). I expect that as a hillfort's overall accessibility increases (lower CSS), fortification scores will also increase.
Results
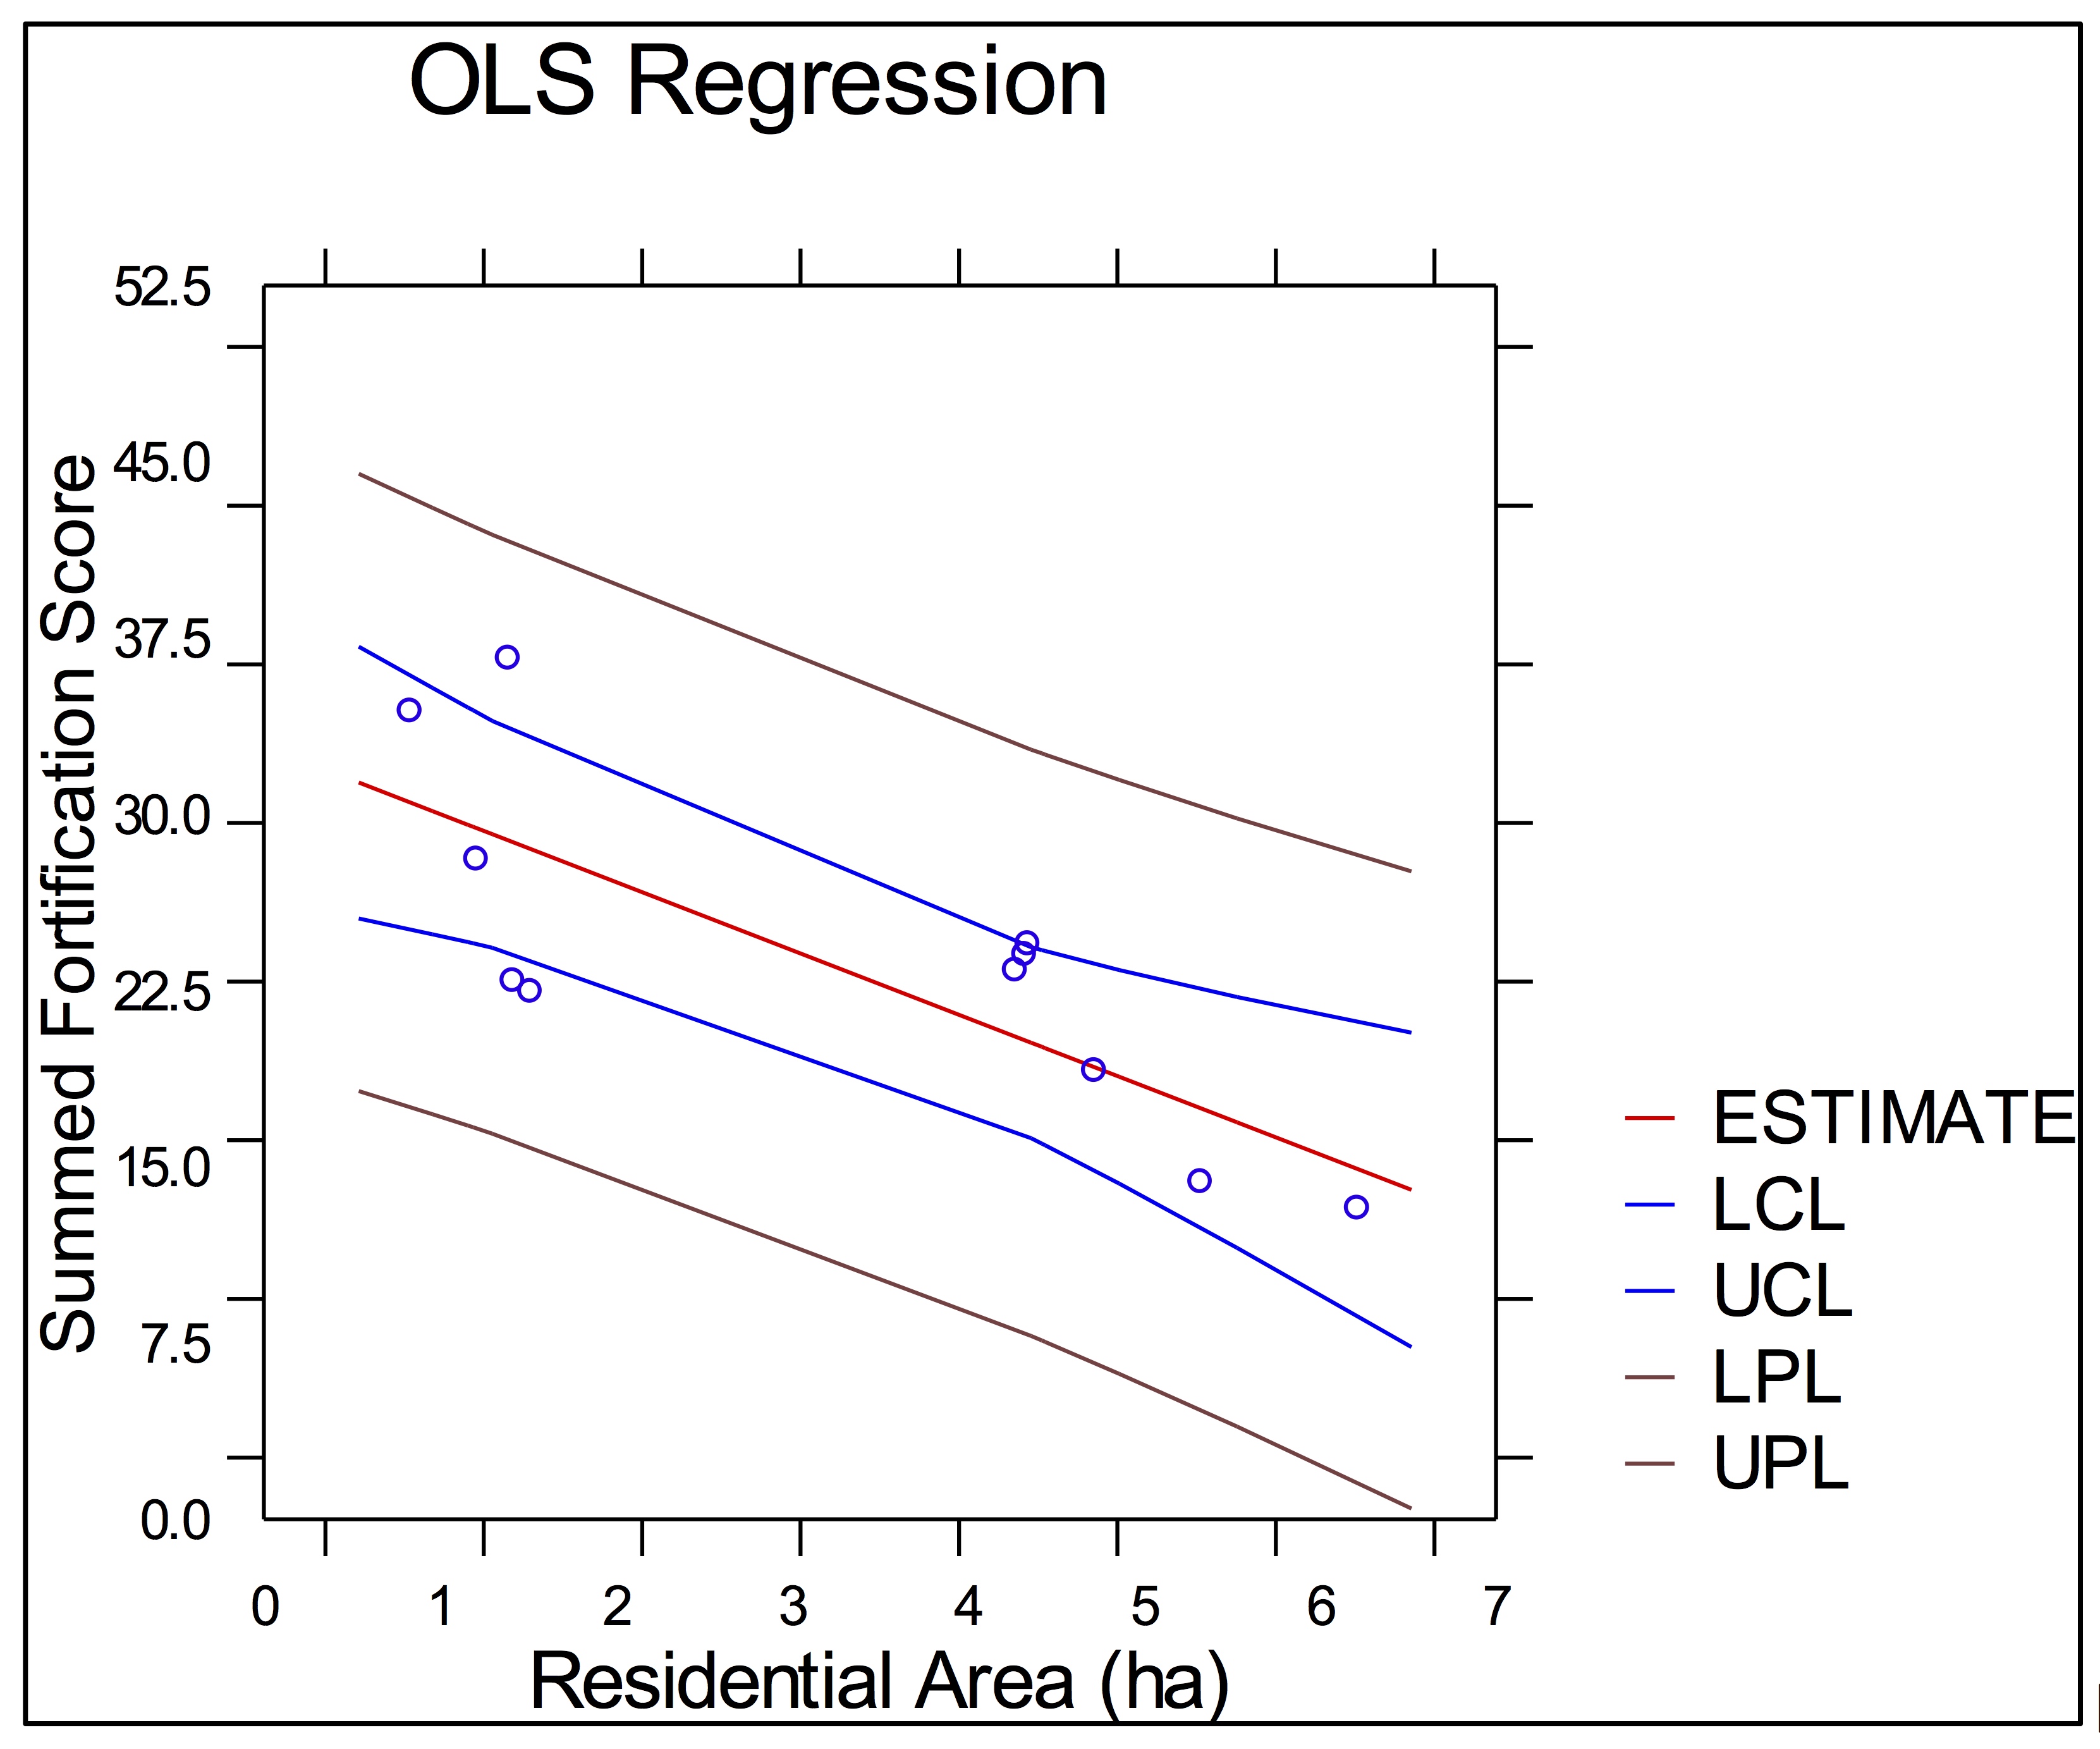
Initial results from the first analysis reveal that Chuluja is a significant outlier that falls well outside the trend of all other hillforts in the sample. With Chuluja removed, a significant negative correlation exists between RA and SFS (r = −0.787), demonstrating that sites with smaller residential areas have larger summed fortification scores, and conversely, sites with larger residential areas exhibit smaller SFS. In addition, RA is a significant predictor of SFS (r 2 = 0.620; p = 0.004; Supplementary Material, Figure 13).
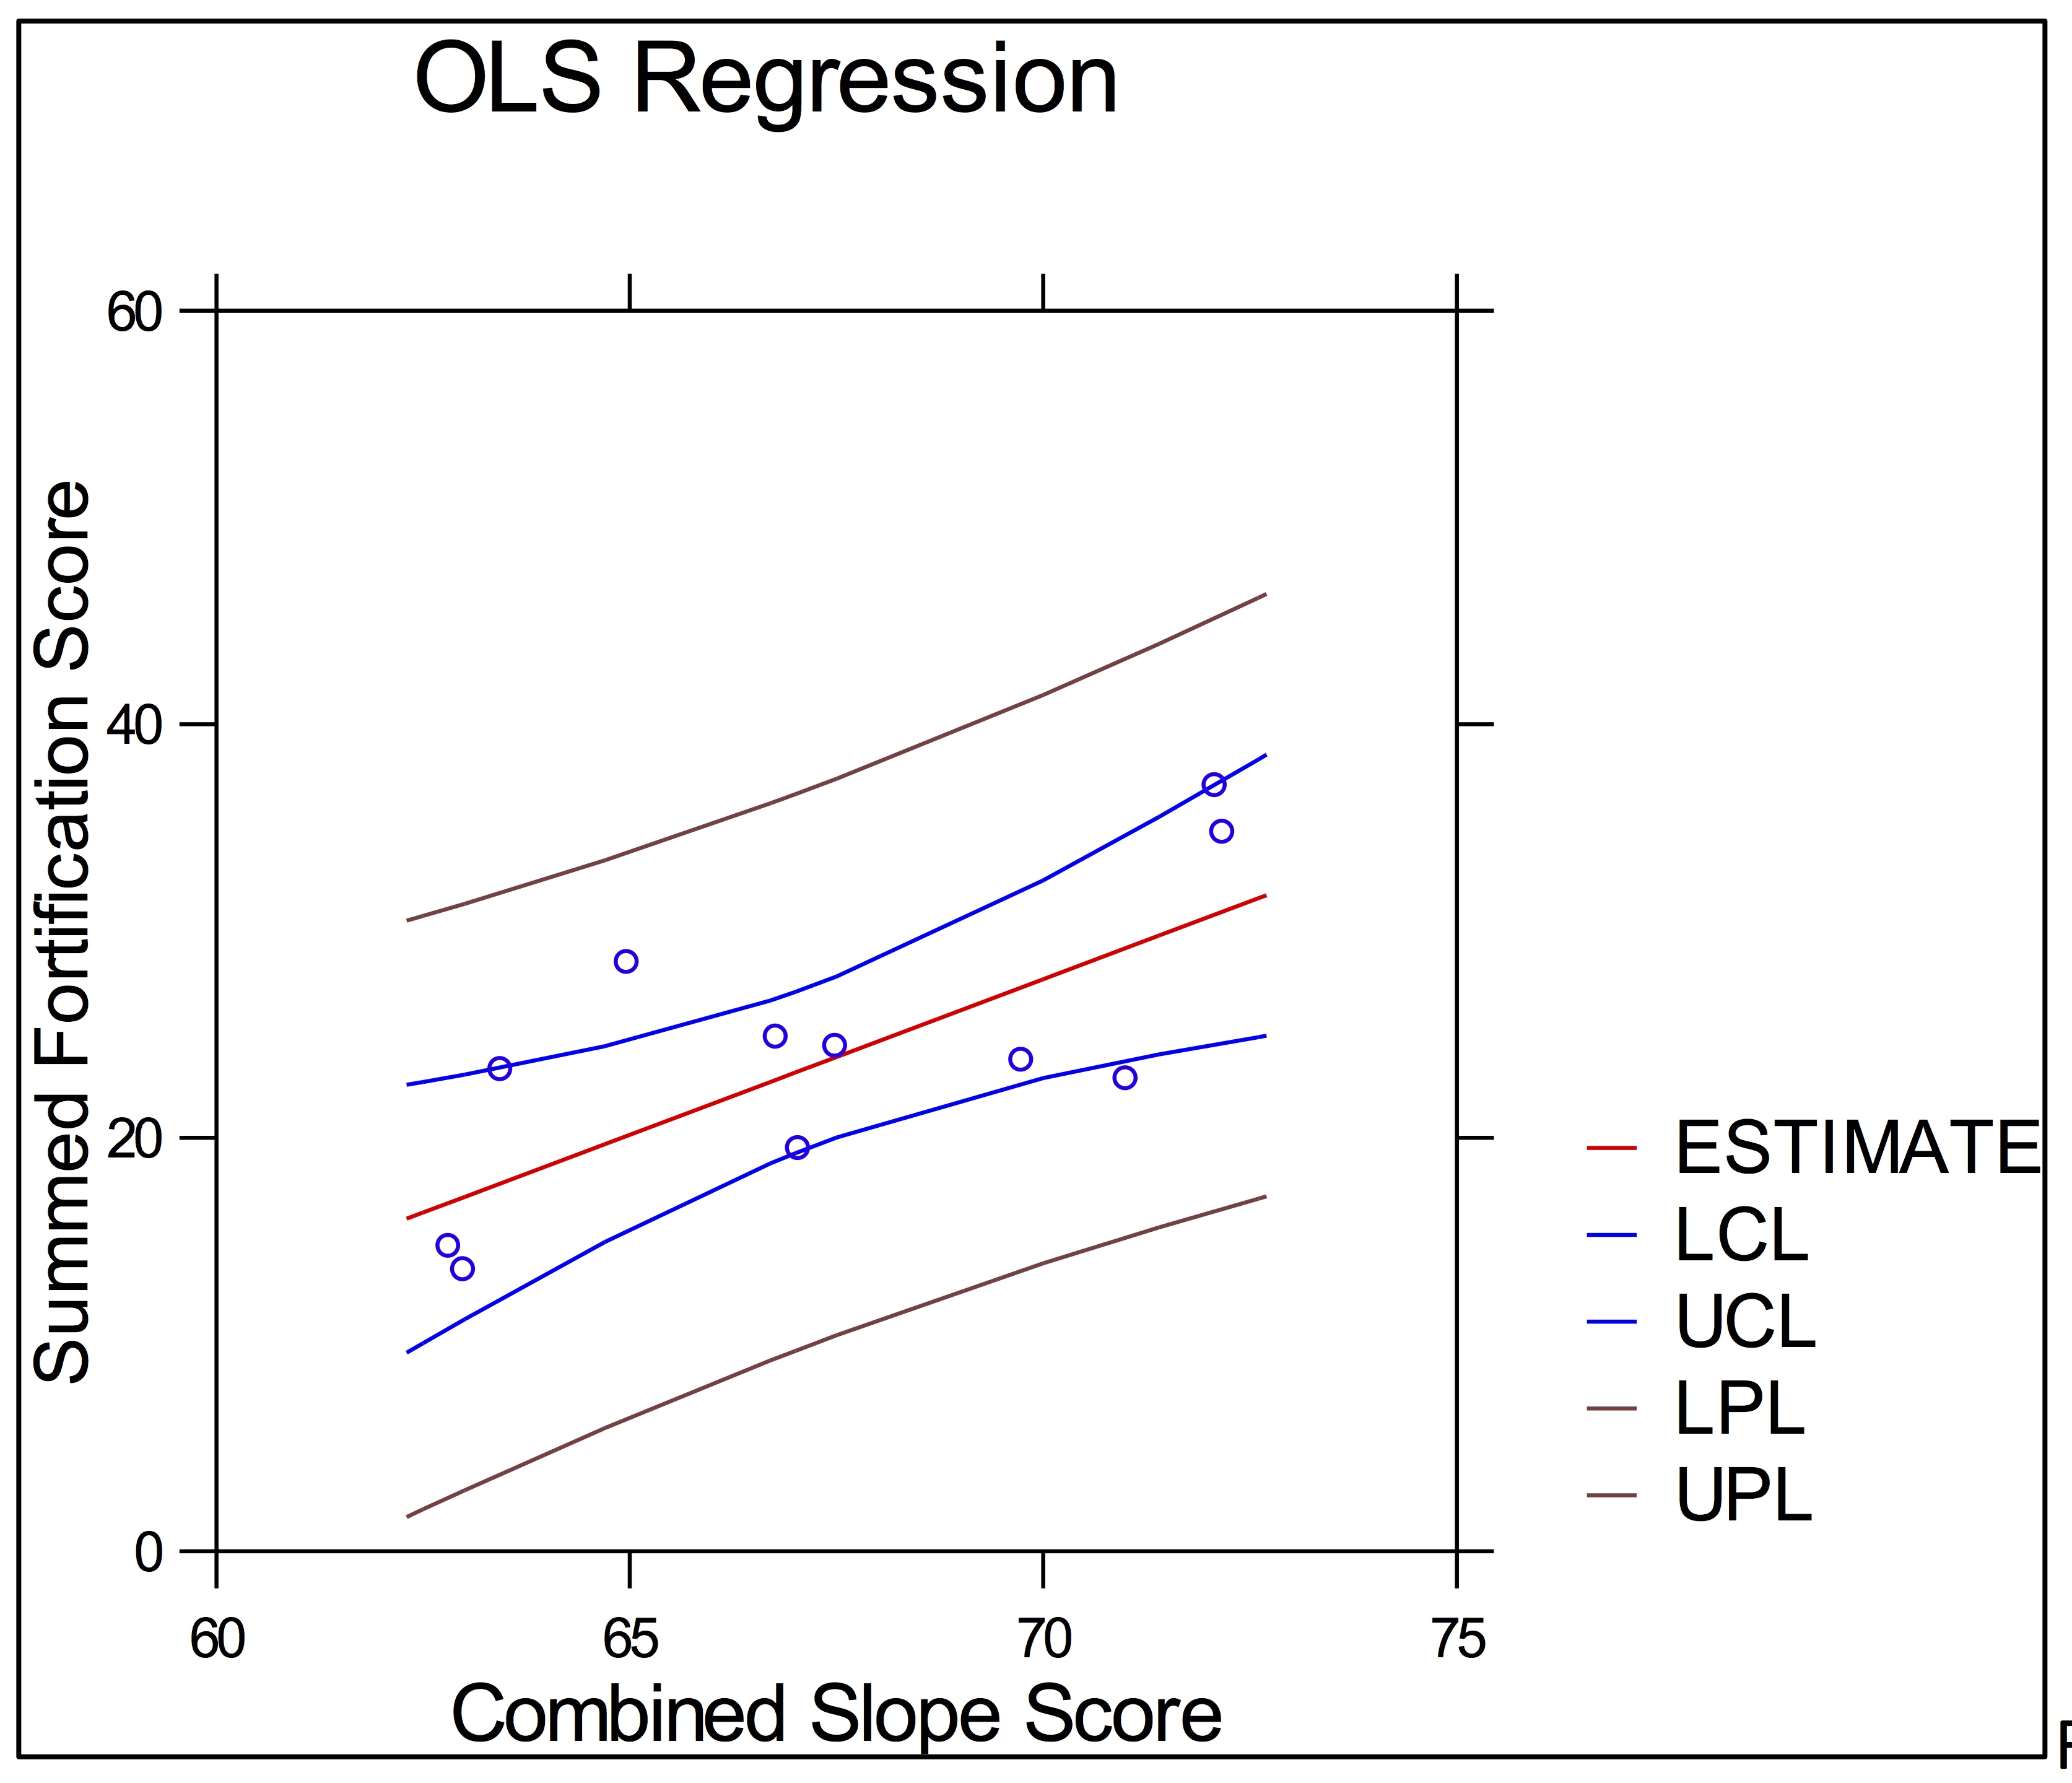
CSS and SFS results also revealed Chuluja to be a significant outlier. With Chuluja removed, a significant positive correlation was found between CSS and SFS (r = 0.739), which refutes the assumption of Field's model that accessibility drives intersite variability in fortification. That is, the least accessible sites are also the most heavily fortified. An OLS regression analysis was performed and results show CSS is a significant predictor of SFS (r 2 = 0.546; p = 0.009; Supplementary Material, Figure 14). This unexpected result is considered in the discussion section.
Finally, a multiple OLS regression was performed to see how much of the variation in SFS is accounted for by the combined RA and CSS variables. Results show that the two independent variables account for over 75% of the variation in SFS across the sites in the region (r 2 = 0.757; p = 0.004). This result shows that the combined variables are significant predictors of intersite variation in fortification and are able to explain the vast majority of variation in fortification designs across the Upper SNR hillforts.
To summarize, results indicate that (1) population size is a significant driver of intersite variation in fortification, whereby smaller populations constructed significantly more fortification features than their larger neighbors; and (2) less accessible sites are more heavily fortified than their more accessible neighbors. These results most closely align with LeBlanc's model (LeBlanc Reference LeBlanc1999) and contrast starkly with patterns in the LIP Lake Titicaca Basin (Arkush Reference Arkush2011). Statistical results show the opposite trend from that predicted by the Field (Reference Field1998) model.
Settlement Pattern Analysis
The selection of a settlement location is dictated by trade-offs between competing variables, any one or combination of which can influence the decision to settle in a particular place. Ideal defensive locations exhibit qualities such as natural defensibility, large viewsheds, and close proximity to critical resources or allies (Rua et al. Reference Rua, Gonçalves and Figueiredo2013; Smith and Cochrane Reference Smith and Cochrane2011). Few locations exhibit all these features, however, requiring people to make trade-offs between them. This decision-making process is examined at the hillfort sites using macrospatial patterns and GIS-based analyses. The position of each hillfort is used to infer possible cost-benefit decisions made by the resident populations, with the goal of parsing which factors were the most important for determining settlement locations. Statistical analyses were performed to assess whether large viewsheds were significant factors influencing settlement locations.
All 15 settlements are located on hilltops and ridges that provide reasonably flat areas for residential occupations and steep topography for much of the surrounding approaches. At least 50% of each hillfort perimeter faces steep slopes of 60 degrees or more. These spatial factors indicate that defensible topography was a critical factor for determining settlement locations. Nevertheless, the region contains numerous defensible hilltops and ridgelines from which to choose, so what made one location more desirable than another?
The proximity of settlements to agricultural zones and water sources would have been a significant constraint on settlement placement decisions. Every hillfort is located within one kilometer of the nearest agricultural zone. Many of the largest hillforts are located at choke points where the narrow valleys open up into the cabezadas, which contain vital agricultural fields. The position of these hillforts would have severely restricted passage into the cabezadas by forcing human traffic to pass directly through, or in close proximity to, the fortified settlements. These data indicate that groups selected hilltop locations that conferred extensive natural defensibility but also permitted reasonable travel times to the agricultural zones, and provided residents with the ability to control movement within and into the agricultural zones.
GIS Methods
Settlement pattern observations were further explored using the viewshed tool in ArcMap 10.2 and various statistical tests. Viewsheds produce binomial data (0 to 1) from a source point, where 0 represents raster cells that are not visible to the source point and 1 represents visible cells. Viewshed outputs were used to assess the ability of each hillfort population to monitor surrounding country, neighboring hillforts, and resource zones. To test whether hilltops were selected for their visibility potential, a set of 50 random points was created in the study area using ArcMap 10.2. Viewsheds were generated for each of the 50 random points and were compared to the viewsheds of all 15 hillforts using two-sample Kolmogorov–Smirnov (KS) tests and Mann-Whitney U tests. The KS analysis essentially tests whether two nonparametric datasets have significantly different distributions, while the Mann-Whitney U statistic is used to test whether one of the two nonparametric samples has a larger median value than the other. These tests determine whether the hillfort viewsheds are significantly larger than would be expected if they were situated randomly in relation to viewshed (Arkush Reference Arkush2011). If hillfort viewshed sizes are significantly larger than the viewshed sizes of the random points, this will show that the hillforts are placed in locations with some of the largest viewsheds in the region, indicating that the ability to observe the surrounding areas was an important variable for settlement decisions.
Results
Before I report the statistical results, I describe macroscale viewshed observations to highlight three regional patterns. First, viewsheds cover the areas in direct proximity to the agricultural zones and hillforts, permitting populations to observe immediate approaches. Second, hillforts are capable of observing other hillforts within the cabezadas, but not those in neighboring cabezadas. Third, most of the hillforts are unable to observe large parts of the agricultural zones.
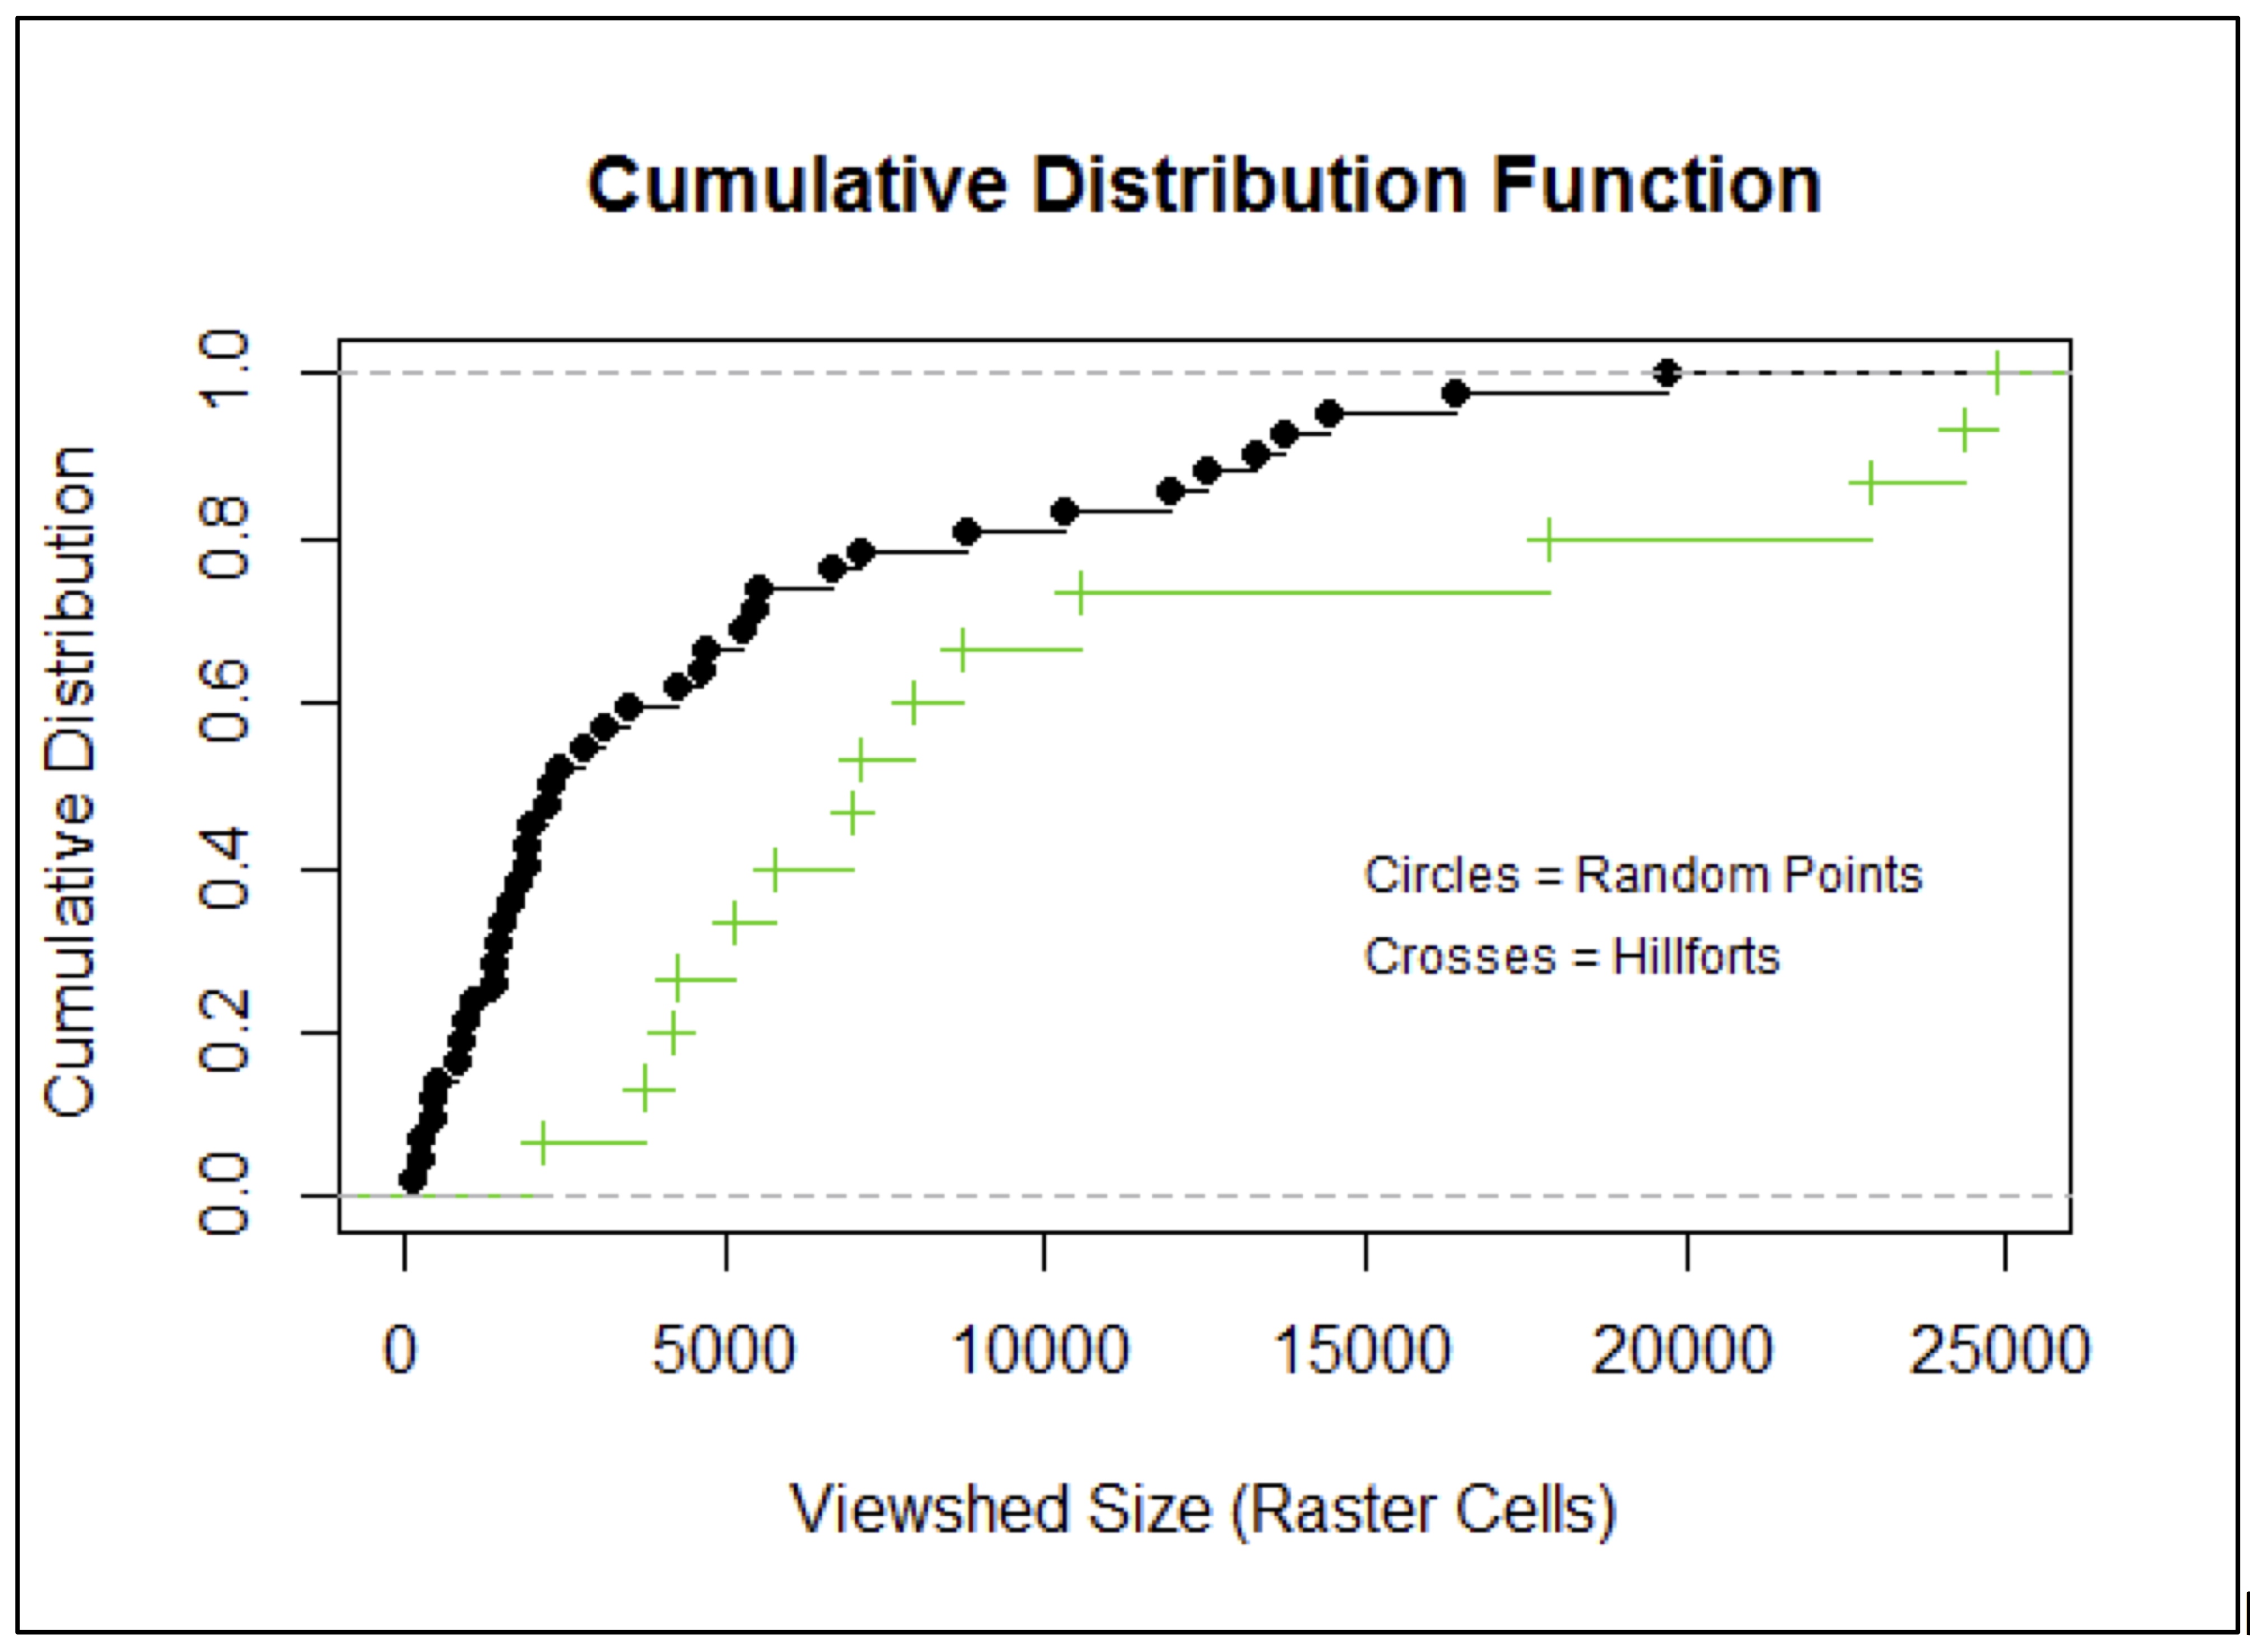
Results of the KS and Mann-Whitney U tests show that the distribution of hillfort viewsheds is significantly different from (larger than) the random-point viewsheds (KS test critical D = 0.513; p = 0.002; Mann-Whitney U test W = 564; one-sided p = 0.001). Despite this significance, previous studies have correctly noted that the large viewsheds commonly associated with defensive sites may be an artifact of their high elevation locations rather than a proactive defensive strategy (Van Leusen Reference Van Leusen1999). To test whether this was the case among the 15 hillforts, a subset of 42 random points that exhibit elevations equal to or higher than the hillfort sites were taken from the original sample and tested using two-sample KS and Mann-Whitney U tests. Results confirm that the distribution of hillfort viewsheds is significantly different from (larger than) the viewsheds from the subset of random points (KS test critical D = 0.53; p = 0.002; Mann-Whitney U test W = 145; one-sided p = 0.001; Supplementary Material, Figure 15). This result indicates that certain hilltops were selected for occupation if they provided large viewsheds, presumably for the purpose of improving the ability to monitor travel corridors and possible avenues of attack by enemy forces. The fact that much of the agricultural zone could not be observed suggests that it was more important to monitor the approaches to the farming areas than the fields themselves. This pattern is not surprising, since the majority of residents would have been involved in agricultural activities and would have been able to supervise their fields, at least during daytime hours.
Results indicate key defensive trade-offs dictating regional settlement patterns. Upper SNR populations were highly discriminating in their settlement decisions, selecting certain locales from among a host of alternative options that maximize defensive benefits and minimize defensive costs. Similar settlement patterns are reported in other regions and perhaps represent common adaptations to chronic warfare (Arkush Reference Arkush2011; Field Reference Field1998, Reference Field2008).
Discussion
Patterns of Defense, Patterns of War
The composition of regional and site-specific spatial and defensive patterns offers insights into the nature of Upper SNR warfare. The distribution of residences within each hillfort is highly nucleated, which is often seen as a form of mutual defense and a viable means for creating more manageable spaces to fortify (Roscoe Reference Roscoe, VanDerwarker and Wilson2016:15). Agricultural populations incur substantial costs by clustering residences into small, confined areas. These costs originate from increased travel times to and from agricultural fields that could otherwise be avoided by dispersed residential distributions (LeBlanc Reference LeBlanc1999:70, 295). These cramped living conditions can also contaminate water sources and increase the probability of disease transmission (Kurin Reference Kurin2016:174). The location of settlements on naturally defensible hilltops decreases accessibility for enemies and residents alike, while further increasing travel costs. The heavy fortifications of the Upper SNR hillforts required substantial investment in construction and maintenance. These costs are highlighted when the defenses of each site are compared to all other types of architectural investments.
The fortifications at each site are the largest and most robust of all architectural features. Indeed, fortifications likely represent the only construction projects that required investment and organization on a community-wide scale (Earle Reference Earle1997). Aside from artificial defenses, the costliest constructions are nuclear family residences, fieldstone corrals, and small open-air plazas that are intermittently lined with uncut stone. For the small-scale communities living in the marginal farming ecology of the Upper SNR, high-investment defensive practices would only be sustained if absolutely necessary (Arkush and Stanish Reference Arkush and Stanish2005; ONERN 1971). The existence of the extensive defensive features and settlement patterns implies that Upper SNR groups were not simply facing an abstract threat of enemy attack, but rather, a threat so real that groups were willing to live in dense residential clusters on hard-to-reach hilltops, surrounded by multiple defensive walls and ditches. All of these sacrifices were deemed necessary to protect people and critical resources from enemy groups. These patterns indicate that warfare was sufficiently frequent and volatile to spur these defensive strategies.
The small populations of the hillforts in the region, combined with decentralized political organization, suggest that substantial forces could not be marshaled for organized territorial or expansionist aggressions. Instead, the observed defensive patterns, combined with the lack of numbers required to form large offensive coalitions, suggest that a pattern of endemic, perhaps internecine, warfare was likely. This interpretation is bolstered by ethnohistorical accounts that describe the LIP in the central and southern highlands as being embroiled in chronic warfare organized by local war chiefs centered on single valleys or combined into multivalley confederacies. These narratives portray warfare as ongoing localized conflicts, motivated by scarce resources and fragile political dynamics (Cieza de León Reference Cieza de León1985:6 [1553:2:iv]; Guamán Poma Reference Guamán Poma de Ayala2009[1615]:1:64; Monzón Reference Monzón1965 [1586]; Sarmiento Reference Sarmiento de Gamboa1988[1572]:46). While it is premature to speculate about the causes that may have led to or perpetuated warfare in the Upper SNR, the combined data suggest that regional warfare was likely defined by internecine strife typical of many small-scale societies (Arkush and Allen Reference Arkush and Allen2006; Keeley Reference Keeley1996).
Deviations from the Field Model Expectations
As shown in the intersite fortification results section, the trend between CSS and SFS is the opposite of the Field model expectation. This pattern initially appears to defy the cost-benefit trade-off between accessibility and fortification investment by showing that the least accessible hillforts are also the most heavily fortified. However, a close examination of the CSS and SFS data reveal that this association corroborates the other intersite fortification results (Supplementary Material, Figure 14). The positive correlation between CSS and SFS is driven by two hillfort sites with the largest CSS and SFS values and by two hillfort sites with the lowest CSS and SFS values. The two hillforts with the largest CSS and SFS values exhibit the smallest and third-smallest RA values (Cerro Amayo and Cerro Tarachallyu). The two hillforts with the smallest CSS and SFS exhibit the largest RA in the region (Ayapata East and Cerro Pucara). The remaining hillforts in the sample do not follow the positive trend. Thus, it appears that population size can explain this unexpected relationship. The region's smallest populations coped with their relative vulnerability by constructing the most substantial fortifications and occupying the least accessible areas. Hillforts with the largest populations elected the opposite strategy—to occupy the most accessible areas and construct fewer fortifications. This interpretation is supported by a strong negative correlation (r = −0.512) between CSS and RA, indicating that as CSS decreases (accessibility increases), RA also increases. The combined results of the intersite fortification analyses and the fact that CSS and RA account for over 75% of the variation in SFS suggest that hillfort population size was the most important factor determining its relative vulnerability or formidability. This, in turn, determined choices regarding accessibility and fortification strategies.
Regional Differences in Fortification Patterns
The deviation of intersite fortification patterns in the Upper SNR from those observed in the Lake Titicaca Basin warrants explanation. Hillforts in the Titicaca Basin display more defensive investment as hillfort population sizes increases (Arkush Reference Arkush2011). Arkush argues that the smallest and most vulnerable groups exhibit the weakest defenses because they were either unable to invest in more robust defenses or were dependent on larger allied groups to come to their aid during attacks (Arkush Reference Arkush2005:261–264, Reference Arkush2011:149–155). Implicit in this argument is the assumption that hillforts with large populations could quickly organize the necessary forces to aid beleaguered allies.
Whether Upper SNR groups were able to depend on allied support is debatable. Certainly the close proximity of hillforts to their nearest neighbors implies some form of cooperation. Nonetheless, several lines of evidence indicate that the defensive system operating in the LIP Titicaca Basin may not have been viable or desirable for Upper SNR groups. The first line of evidence pertains to the degree of sociopolitical and military decentralization in the Upper SNR and surrounding regions; the second relates to population size disparities between the Upper SNR and neighboring regions.
Cross-regional studies and ethnohistorical accounts of LIP warfare show little evidence of the large-scale territorial campaigns and sieges that define state-level conflicts (Arkush Reference Arkush2011:14; Arkush and Stanish Reference Arkush and Stanish2005; Guamán Poma Reference Guamán Poma de Ayala2009[1615]:1:64; Keeley Reference Keeley1996). Instead, warfare was decentralized and organized around cyclical raids and small-scale attacks that most often relied on speed and stealth (Arkush Reference Arkush2005:85; Arkush and Tung Reference Arkush and Tung2013; Julien Reference Julien2003). This form of warfare lacks the organizational and logistical structure needed to besiege hillforts, or the incentive and punishment systems to compel individuals to assault heavily fortified settlements (Arkush and Stanish Reference Arkush and Stanish2005; Carneiro Reference Carneiro, Reyna and Downs1994; D'Altroy Reference D'Altroy1992; Keeley Reference Keeley1996). The lack of centralized political structures in the Upper SNR and the surrounding regions suggests that warfare likely mirrored larger patterns of highland LIP conflict (Abraham Reference Abraham2010; Conlee Reference Conlee2004).
The reliance on quick raids, surprise attacks, and ambushes indicates that offensive tactics would focus on the most vulnerable targets rather than heavily fortified settlements or refuges. In the Upper SNR, the least protected targets would have been the smallest hillforts, with the fewest combatants to rally to their defense, and isolated individuals and resources. These vulnerable settlements would have been prime targets for attacks or raids unless heavier defenses or effective support from allies compensated for their numerical inferiority. Conversely, the largest settlements in the region would have been the most formidable, and therefore the least likely targets of enemy attack. This would have allowed the largest settlements in the region to rely more on their relatively large pool of combatants and less on costly fortifications or potentially unreliable allies.
Several lines of evidence raise questions about whether Upper SNR populations could depend on allied support. Cross-regional and temporal studies of military capabilities show that small-scale, decentralized societies do not have professional militaries to organize immediate troop mobilizations or permanent defense forces (Carneiro Reference Carneiro and Haas1990; Keeley Reference Keeley1996:46, 79; Redmond Reference Redmond, Brumfiel and Fox1994). Instead, combatants are drawn from the general population rather than a subset of trained full-time warriors (Keeley Reference Keeley1996:34). These individuals are involved in diverse nonmilitary activities, which could delay efficient mobilization in response to attacks or raids. This problem would have been especially acute for Upper SNR groups, who would have been regularly scattered throughout the agricultural zones or far afield tending to herds on the puna. These organizational challenges could have limited a group's ability to provide effective aid to allies.
While these challenges could potentially be overcome, they suggest that organizing a defense at a threatened settlement and mobilizing larger coalition forces from allied neighbors may have been difficult and time-consuming affairs. These delays would have required settlements to rely on their own defensive abilities until reinforcements arrived. If a raid or attack achieved some degree of surprise, which is highly likely given the offensive tactics of the period, effective aid would be even more problematic. If a settlement were caught off guard, many of the potential defenders would be scattered throughout the area. This problem would be especially salient for the region's smallest groups, whose already diminutive combatant pool would be even further reduced while reinforcements were collected. Before aid could be organized and deployed, individuals remaining in the unprepared settlement may have had to combat direct attacks if their defending forces were sufficiently weak. They may also have been unable to drive off enemy forces attacking areas outside the protective defenses of the hillfort. To cope with this potentially lethal delay in reinforcements, it would have behooved smaller groups to invest heavily in defenses to deter direct assaults on settlements and push attackers to focus on less vital targets while support was being rallied.
It is also plausible that the military capabilities of Upper SNR groups were not sufficiently rapid, organized, or powerful to confront enemy attacks outside of protected hillforts. Each group would then have to rely on its own defensive autonomy to repel the enemy, even if allied neighbors were in close proximity. If this were the case, the optimal strategy for the smallest, most vulnerable settlements would have been to invest in substantial defenses.
In addition to these organizational issues, the Upper SNR contained a relatively small population in comparison to the surrounding regions (Conlee and Schreiber Reference Conlee, Schreiber, Elson and Covey2006; Meddens and Schreiber Reference Meddens and Schreiber2010). These demographic disparities suggest that neighboring groups had the potential to organize larger, more powerful coalitions. If attacked by larger forces, the Upper SNR groups would have been at a distinct disadvantage and may have had to rely on defenses to compensate for numerical inferiority. These factors may have forced groups to remain behind the walls of their hillforts during attacks rather than rallying to expel attacking forces, thereby incentivizing increased investment in defenses.
To summarize, multiple lines of evidence indicate that military assistance among neighboring Upper SNR hillforts was likely infeasible, unreliable, or inadequate, forcing each of the region's settlements to occupy defensible hilltops and construct substantial fortifications. Investment in defense would have been most essential for the smallest settlements in the region, whose limited combatant pool would have rendered them the most vulnerable. To cope with this susceptibility, the smallest settlements display the greatest number of fortifications and occupy the least accessible areas. Naturally defensible locations with heavy defenses reduce the probability that attacking forces will directly assault settlements; if an assault did occur, the assailants would be less likely to gain entrance to the residential sector before reinforcements could arrive.
Summary and Conclusions
Settlement patterns demonstrate that each hillfort is centered on or in close proximity to key resources and likely travel corridors. Each hillfort is excellently situated to monitor and control movement into and out of the cabezadas. Naturally defensible hilltops with large viewsheds were preferentially selected for settlement. These natural defensive benefits allowed residents to invest less in artificial defensive measures when topography was sufficiently steep. Intersite fortification patterns show that hillforts with the smallest relative populations contain the heaviest fortifications and are the least accessible settlements in the region. This strategy helped to cope with the increased vulnerability of having fewer people to rally to defense and an inability to rely on neighboring allies for defensive support.
Regional spatial and architectural data reveal patterns of Upper SNR conflict. Small group sizes, decentralized political structures, and high degrees of defensive investment suggest a pattern of endemic and possibly internecine warfare, although the current lack of corroborating evidence renders this interpretation tentative. Nevertheless, this explanation is supported by ethnohistorical narratives that describe the LIP in the central and southern Andes as characterized by sectarian warfare over scarce resources and political power (Cieza de León Reference Cieza de León1985:6 [1553:2:iv]; Guamán Poma Reference Guamán Poma de Ayala2009[1615]:1:64).
This research demonstrates that the challenges associated with small-scale warfare fostered ingenuity and cooperation. Planned collective actions would have been required to coordinate and execute the observed defensive strategies. It is clear that LIP defensive strategies were defined by conscious and coordinated group actions that adapted defensive systems to the nature of the warfare being experienced.
In conclusion, this research developed effective and practical methods for standardized and replicable quantitative analysis of fortifications. By applying techniques that can be used to compare and contrast variation in defensive designs, archaeologists are better prepared to evaluate explanatory models of defensive strategies and warfare across regional contexts.
Acknowledgments
There are many people and organizations to be credited for their help and guidance. I would like to thank professors Katharina Schreiber, Amber VanDerwarker, Danielle Kurin, and Michael Jochim for their assistance and constructive criticisms during the research and writing phases. I would also like to thank Victor, Leoncio, Angela, and Daniel for helping me navigate the social and archaeological landscapes of the Nazca region. Fieldwork was supported by UCSB Anthropology Department Graduate Student Research Grants and a UCSB Humanities and Social Sciences Research Grant.
Data Availability Statement
The precise locations of sites are not disclosed in order to protect the valuable residential and cemetery contexts. Digital data in addition to the data disclosed in this manuscript may be made available by the author for research purposes.
Supplemental Materials
Supplemental materials are linked to the online version of the manuscript, accessible via the SAA member login at https://doi.org/10.1017/laq.2017.28
Supplemental Figure 1. Cerro Anamarca, Aja cabezada.
Supplemental Figure 2. Ayapata, Tierras Blancas cabezada.
Supplemental Figure 3. Ayapata East, Tierras Blancas cabezada.
Supplemental Figure 4. Cerro Pucara, Tierras Blancas cabezada.
Supplemental Figure 5. Cerro Tarachallyu, Tierras Blancas cabezada.
Supplemental Figure 6. Toma, Taruga cabezada.
Supplemental Figure 7. Cruz Pata, Taruga cabezada.
Supplemental Figure 8. Cerro Ayapata, Chauchilla cabezada.
Supplemental Figure 9. Cerro Amayo, Chauchilla cabezada.
Supplemental Figure 10. Chuluja, Chauchilla cabezada.
Supplemental Figure 11. Cerro Tribolpata, Las Trancas cabezada.
Supplemental Figure 12. Cerro Chillca, Las Trancas cabezada.
Supplemental Figure 13. OLS Regression of RA and SFS.
Supplemental Figure 14. OLS Regression of CSS and SFS.
Supplemental Figure 15. Distribution plot of the KS test for Random Point and Hillfort Viewshed Sizes.